Quantcast
Channel: Make Your Own Archives - Kalyn Brooke
Viewing all 26 articles
Browse latest View live

Make Your Own Hot Cocoa Mix {With Ingredients You Already Have}

$
0
0


hotcocoapin

You’d think it would be easy to find a DIY Hot Cocoa Mix that uses ingredients you already have on hand. It’s not.

Non-dairy creamer, anyone? Nope – not a coffee drinker.

White chocolate chips? Don’t always have those around.

After some unsuccessful trial and errors by myself, I finally found a recipe by Alton Brown – you might have seen him on the Food Network.

The thing I love most about this recipe is that every ingredient is probably in your pantry right now, which is super convenient! Just make sure everything is up to date and not expired before you use it. I didn’t think non-fat dry milk could expire. Trust me, it does.

So, two batches later, we have a winner.

hotcocoa4

I think the real key is to make sure you use quality cocoa powder. I like to use Dutch Process Cocoa Powder from Penzey’s Spices. It’s results in a much smoother, darker, and richer cocoa, not to mention it’s amazing in baked goods.

Then, you have the option of add-in’s, which is the fun part.

  • Mini Marshmallows – traditional and kid’s love ‘em.
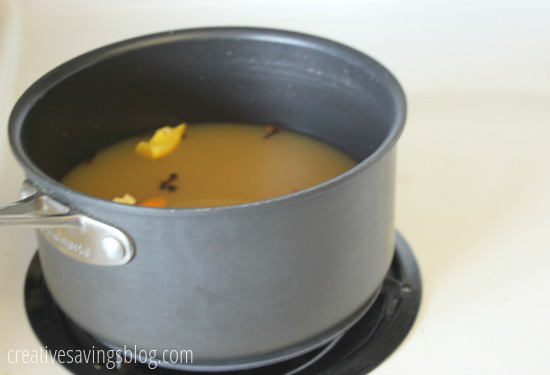
  • Cinnamon Sticks – makes the cocoa smoother.
  • Candy Canes – you probably have some leftover from Christmas, but if not, you can always put in a little bit of peppermint extract.

hotcocoa3

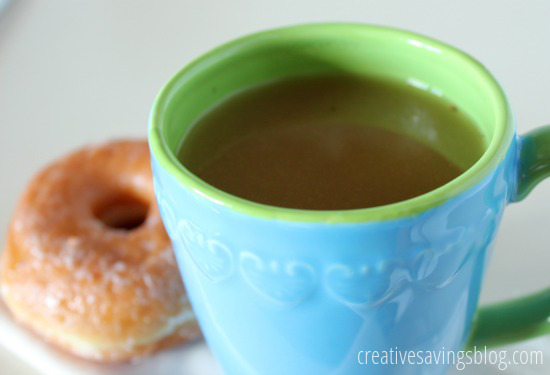
Keep this mix on hand for a movie night at home, snuggle time with a good book, or take it with you on the road. Hubby and I are going to pack some for our weekend getaway (which we are leaving for today!) and enjoy it at our B&B by the fire.

Here’s the recipe:

Basic Hot Cocoa Mix

Yield: 5 1/2 cups dry mix

Ingredients:

  • 2 cups powdered sugar
  • 1 cup cocoa (Dutch-process preferred)
  • 2 1/2 cups powdered milk
  • 1 teaspoon salt
  • 2 teaspoons cornstarch

Directions:

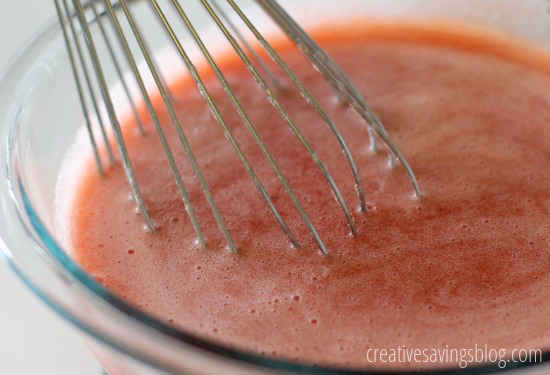
1. Combine all ingredients together with a whisk.

2. Place at least 3 tbsp of mix per mug, add hot water, and add more mix to suit your tastes, if needed.

Recipe altered slightly from Alton Brown

{Printable Recipe}

If you only want a basic mix that whips up in a jiffy, this is your go-to recipe. Plus, it’s cheaper to make than popular store brands.

I wouldn’t go as far to say it taste better than Land O’Lakes (they have some pretty awesome flavors!), but it does do a decent job at being compatible with most in store mixes.

Total Cost: $3.44 or $.19/cup

hotcocoaprice

Have you ever tried making your own hot cocoa mix?

The post Make Your Own Hot Cocoa Mix {With Ingredients You Already Have} appeared first on Creative Savings.


Make Your Own Sandwich Bread

$
0
0


Last week, I finally forced myself to get back into the habit of making my own bread. I had been doing so well at it before, but life got in the way, and before I knew it, I was throwing loaves of processed, more expensive bread into my cart with other groceries.

Now that I’m working from home, I have a little bit more time on hand to start making bread again. Well, that, and because I really wanted a sandwich and we were out of bread.

everydaybreadPin

What I love about this bread is that it’s soft, fairly healthy, and freezes really well. It’s not that hard either. I let the bread machine do most of the work, but I still let it bake in the oven.

Let me show you how it’s done.

First, lug out your big bread machine and start putting in warm water and olive oil. Wait…what? Olive oil? Weird, right? But olive oil is supposed to be good for you, and I really can’t taste the difference.

After the liquids, dump in the flours and salt, but make sure the sugar gets placed in one corner. We don’t want it to touch the yeast just yet.

The yeast will go in a little hole that you make with your finger in the middle of the flours.

everydaybreadingredientsCS

Turn the bread machine onto the dough setting, and let it do it’s thing for 1 1/2 hours. Then pull the bread out, and separate into 2 loaves, placing them into greased bread pans.

I prefer this method, because if I let the bread machine actually make and bake the bread, I get a really high loaf that makes for a really huge sandwich. It’s also harder to cut cleanly. The 2 smaller loaves are the perfect size for everyday sandwiches, thus the name of this recipe!

everydaybreadcollageCS

After baking, let them cool in the pans for 10 minutes, then take them out to finish cooling on wire racks. Once the bread is completely cool, start cutting them in slices with a bread knife. You should be able to get 10 normal sized slices out of each loaf.

I usually keep one loaf on my counter in a storage bag, unsliced so it doesn’t dry out. The I cut slices whenever I need to make sandwiches or toast. The other one is sliced, wrapped in plastic wrap, then wrapped in aluminum foil for added protection and placed in the freezer.

It’s so much easier to use bread from the freezer when it’s sliced!

breadbagCS

Everyday Sandwich Bread

Yield: 2 loaves

Ingredients:

  • 1 1/3 cups warm water
  • 1/3 cup olive oil
  • 2 tsp salt
  • 1 1/2 cups whole wheat flour
  • 2 1/2 cups bread flour
  • 2 tbsp + 2 tsp sugar
  • 1 tbsp yeast

Directions:

1. In bread machine, combine water, oil, and salt. Add the flour on top of the liquids. Pour sugar into one corner of machine. Make finger dent in center of flour and pour yeast into it. Set machine on dough setting.

2. Separate the dough into two greased loaf pans and let rise for an hour or so.

3. Bake at 350 F for approximately 30 minutes. Let cool in pans for 10 minutes, then finish cooling on wire racks. Cut and serve, or slice and freeze.

{Printable Recipe}

When I know I have a few hours at home without any errands to run, I’ll sometimes whip up 1 or 2 batches just to have on hand in the deep freezer. It’s so handy, and so much cheaper than buying a $2 loaf at the store.

Well, I guess you could get those giant white bread loafs for $.99, but then again, that’s just like eating fluffy sugar. I’d rather save that for ice cream.

Total Cost: $1.81 or $.91/loaf

everydaybreadpriceCS

How often do you make your own sandwich bread?


Troubleshoot Tip: If your bread doesn’t rise very much, make sure the air conditioning is turned off and the bread is located far away from a window or any other drafty area. 

The post Make Your Own Sandwich Bread appeared first on Creative Savings.

Make Your Own Croutons

$
0
0


croutonpin

I pretty much never eat the bread heels…do you? I find them tough, and flavorless, but don’t want to ditch them completely because they can be turned into a couple of really good things…like croutons!

I always like to keep a stash of heels in the freezer, and as we finish up each loaf of our Everyday Sandwich Bread, I keep adding to the pile.

Then when I’m ready to make some croutons, or bread crumbs (the latter is more likely to happen), I pull out 3 or 4 slices and start cutting them into squares.

croutonpiecesCS

If you’re not a salad girl like me *ahem*, I suggest you don’t make the entire batch, especially if you have a gold mine of bread heels in your freezer. The croutons only last a week or so, and then they get soggy. Ick.

I know you can make homemade croutons in the oven, but for my experiment, I used a skillet doused with a little bit of olive oil. I really can’t tell you how much….just start with a couple tablespoons and see if you need more. You don’t want them to drown, but you don’t want them to burn either.

Also, do this in batches. If the pan is crowded, the bread pieces won’t have room to toast and get all golden brown.

croutonpancs

During this basking session (which will last approximately 5 minutes), sprinkle in whatever spices suit your fancy to give the croutons a nice flavor.

Don’t worry about getting exact proportions right, and have fun experimenting! I did an Italian Seasoning batch, and a Basil/Garlic batch. Though I’m thinking Parmesan sounds really good too.

Just make sure you separate and label everything if you do two different kinds.

croutonbrownedcs

When the croutons start looking toasty, they are done. Although, I usually taste test them first to see if they need to be toasted a little bit more. I like crunchy croutons!

Set out a couple plates with paper towels on them and make sure to dab up the excess oil if they need it.

croutonpapertowelCS

I could really just eat these right out of the pan, but I was a good little girl and actually made myself a salad.

croutonsaladcs

Though homemade croutons are fairly easy, they are only slightly less expensive than the packaged version.

I can usually get a store brand bag of croutons for $1.99, and it lasts me a good long while. These last only a week at best before the crunch is completely gone.

Croutonpricing

Basically, it’s up to you to decide whether you want to save $.12 for a cup of croutons, or take advantage of the time and efficiency of a store bought bag. It also depends on how often you eat a salad.

A dinner party with a fancy salad side dish, however, might be the perfect debut for those leftover bread heels.

Have you ever tried making your own croutons?

The post Make Your Own Croutons appeared first on Creative Savings.

Make Your Own Homemade Lemonade

$
0
0

 This post may contain affiliate links. Read my full disclosure policy here.

Nothing compares to the from-scratch taste of homemade lemonade. Make it for a special occasion, or as a Summer treat on a hot day!

I always thought making your own homemade lemonade would be way too much work, which is why I often rely on a canister of Country Time as a pantry staple.

Then I actually made lemonade from scratch, and realized I was right. It is a lot of work! Squeezing 16 lemons is no easy feat.

But it’s oh so very yummy, and if you need an excuse to host a Summer party, this is the lemonade recipe to use. Serve it up in a pretty punch bowl, add some floating mint leaves, and be prepared for compliments!

How to Make Homemade Lemonade

How to Make Homemade Lemonade

Step 1: Measure out sugar into a medium bowl, add boiling water, and stir until sugar is completely dissolved. Let it cool.

Steps to making homemade lemonade

Step 2: Squeeze lemons into a measuring cup {I love my Pyrex one!}, and grate one lemon for zest.

If you don’t have enough juice, you can always make up the difference with store bought lemon juice in a pinch, but I would seriously try to avoid it. The flavor tends to be more acidic and the lemonade just doesn’t taste as fresh.

How to make homemade lemonadeStep 3: Strain the juice to eliminate seeds and pulp. I didn’t have any cheesecloth available, so I had to think of something to DIY. Whatever works, right?

How to make homemade lemonade

Step 4: Add lemon juice and zest to the sugar water and stir until everything is well-blended. You now have what we call lemonade syrup.

Lemonade syrup to make homemade lemonade

Step 5: Pour syrup into a gallon pitcher and fill with water until it almost reaches the top. Stir, and pour yourself a cool refreshing drink!

How to make homemade lemonade

Homemade Lemonade

Yield: 1 Gallon

Homemade Lemonade

Ingredients

  • 2 1/4 cups sugar
  • 3/4 cup boiling water
  • 2 1/4 cups fresh lemon juice {approx 16 lemons}
  • 1 1/2 tbsp grated lemon zest
  • Wedge for garnish {optional}

Instructions

  1. Measure sugar into a large bowl. Add the boiling water, stirring constantly until the sugar has completely dissolved. Let the sugar mixture stand until it is cool.
  2. Add the lemon juice and zest to the sugar mixture, and stir until all the ingredients are well blended. Pour into a gallon pitcher and fill with water. Refrigerate for up to 1 week.

Notes

Recipe adapted from Homemade

Schema/Recipe SEO Data Markup by ZipList Recipe Plugin
http://creativesavingsblog.com/make-your-own/homemade-lemonade/

Total Cost: $5.97 per gallon or $.37 per 8 oz glass

Make vs Buy

Despite what you might think, lemonade is not cheaper make at home. Not even close.

Even if I bought lemons at 3/$1.00 {the best sale I found}, it still can’t compete with a $.99 store bought carton. Granted, it doesn’t always taste as good, but it would definitely be more affordable.

Homemade Lemonade vs Store Bought

I suppose I’ll just have to save this recipe for special occasions, or when I find a really good sale. Because on a hot and humid Florida day, a refreshing sip of homemade lemonade would be so worth it!

Have you ever made homemade lemonade?


homemade lemonade with real lemons

Disclosure: Some of the links in the post above are affiliate links. This means if you click on the link and purchase the item, I will receive an affiliate commission. Regardless, I only recommend products or services I use personally and believe will add value to my readers. Read my full disclosure policy here.

The post Make Your Own Homemade Lemonade appeared first on Creative Savings.

Make Your Own Spiced Cider

$
0
0

This post may contain affiliate links. Read my full disclosure policy here.

Skip the drive-thru and make your own spiced cider at home. Just a few ingredients leave your kitchen smelling like Fall!

It might be 90 degrees outside, but I can’t live without my most favorite Fall treat. And no, it is not a pumpkin spice latte…..it’s hot spiced apple cider!

Mmm….I love it.

I’m not a coffee drinker, and I rarely do tea, so spiced cider is my go-to hot drink when the season changes…even if it doesn’t feel like it outside.

I’ve tried both Starbucks and Dunkin Donuts cider, but both were too sweet, too thick, and not enough of the apple showed through for me. So now I just mix up my own at home.

Normally I would use a bag of mulling spices, but since I ran out of them last year, it was time to put together my own concoction. Following a trusted recipe, of course. I’m not that efficient in the kitchen.

How to Make Spiced Apple Cider

Step 1: Prep and measure out all the ingredients – including cut strips of orange zest and a split vanilla bean.

Ingredients for Spiced Cider

I had actually never cooked with a vanilla bean before and I must say, I would definitely do it again. The smell was heavenly, and the cost wasn’t too horrible either. I try to buy all my spices from Amish bulk food stores, which saves me a ton of money anyway.

Of course, I have yet to find one down here in Florida, so if you know something I don’t, please enlighten me!

Spiced Cider ingredients

Step 2: Pour apple cider into a sauce pan with all the rest of the ingredients and spices, and bring to a boil.

If you have cheesecloth, it can be quite handy to hold all your spices so you can easily remove them when you need too. Otherwise, scoop out spices with a slotted spoon when the time comes. Since everything is a whole spice, and not ground, this is simple to do as well.

Spiced Cider

Step 3: Once cider starts boiling, remove from the heat and let everything steep for 30 minutes.

Spiced Cider

Step 4: Discard all spices and put back onto low heat. Cider should start to steam after 5-7 minutes, which means it’s time to enjoy this lovely hot drink!

Make Your Own Spiced Cider

Make Your Own Spiced Cider | Creative Savings

Make Your Own Spiced Cider

Yield: 2-3 servings

Ingredients

  • 4 cups apple cider
  • 10 whole cloves
  • 10 black peppercorns
  • 4 strips {3 x 1/2 in each} orange zest
  • 1 cinnamon stick, cracked
  • 1 vanilla bean, split {or 1-2 tsp extract}

Instructions

  1. In a medium saucepan over moderate heat, combine the ingredients; bring mixture to a boil. Remove the saucepan from heat and let stand 30 minutes to steep. Remove and discard the spices.
  2. Return the saucepan to low heat and slowly cook until the cider begins to steam. Ladle the cider into mugs, wait 3-5 minutes, and serve.

Notes

Recipe adapted from Homemade

Schema/Recipe SEO Data Markup by ZipList Recipe Plugin
http://creativesavingsblog.com/make-your-own/spiced-cider/

Total Cost: $4.51 or $1.50/serving {w/ vanilla bean}

$3.66 or $1.22/serving {w/ vanilla extract}

Since cider is so expensive anyway, I wasn’t expecting Spiced Cider to be super cheap. But you have to splurge every once in a while, right? I don’t think 1 gallon a year will totally destroy our grocery budget, although the cost alone makes me savor every drop!

Because this process is a little time-consuming, you have two options to quickly brew yourself a cup when the craving hits. Either make an entire gallon of spiced cider, and freeze the rest to heat as needed, or throw a party and put it in the crockpot to keep hot.

Then grab an awesome book, cuddle up under a fuzzy blanket, and let the flavors of Autumn warm your hands, and keep your insides nice and toasty.

What is your favorite Fall treat?


Freezer Friendly Spiced Cider | Creative Savings

Tweetables:

  • Skip the drive-thru and make spiced cider at home. Just a few ingredients leave your kitchen smelling like Fall! <– {Click to Tweet}

Disclosure: Some of the links in the post above are affiliate links. This means if you click on the link and purchase the item, I will receive an affiliate commission. Regardless, I only recommend products or services I use personally and believe will add value to my readers. Read my full disclosure policy here.

The post Make Your Own Spiced Cider appeared first on Creative Savings.

Make Your Own Breadcrumbs

$
0
0

 This post may contain affiliate links. Read my full disclosure policy here.

Don't waste money on stale breadcrumbs from the store. This easy homemade recipe comes together in less than 10 minutes, and is so flavorful!

I used to buy breadcrumbs at least a few times a year.

One large tub would last through multiple casseroles, breaded chicken, and a plethora of pasta dishes, and I honestly thought there was nothing wrong with it…until I looked at our grocery budget and decided store bought breadcrumbs was just plain silly to spend money on!

I finally figured out my very own recipe that keeps in the freezer for just as long, and haven’t bought bread crumbs since. Plus, I think they just taste so much better, especially since I toast them in lots of butter and flavor them with seasonings. If you’re just starting to experiment with “from scratch” pantry staples, this recipe could not be any easier!

How to Make Homemade Breadcrumbs

Step 1: Start saving all the end pieces of bread loaves in a separate bag in your freezer. You can use a freezer bag, or just keep a stash going in an empty bread bag. Once the bag is full, take out of the freezer, break the bread apart, and place a few separate pieces in the food processor at a time. I love love love my Ninja Blender for this! Make Your Own Breadcrumbs | Creative Savings If you don’t have a food processor, you can still make bread crumbs with a hand grater. It just takes more time, but works perfectly in a pinch! I would suggest you use frozen bread so it crumbles apart easier. Step 2: Pull out a large skillet and melt 1 tbsp butter on medium heat. Make Your Own Breadcrumbs | Creative Savings Step 3: Add 1 cup of breadcrumbs and 1 tbsp Italian seasoning to the pan. If you want to keep the breadcrumbs plain, just omit the seasoning. Make Your Own Breadcrumbs | Creative Savings Step 4: Stir breadcrumbs until toasty brown. I think the best way to know when the crumbs are done, is when they feel dry and brittle to the touch. Step 5: Let cool on a cookie sheet and then package into labeled freezer bags. See? It’s SO easy! Make Your Own Breadcrumbs | Creative Savings

Make Your Own Breadcrumbs

Serving Size: 1 cup

Ingredients

  • 2-3 bread heels
  • 1 tbsp butter
  • 1 tbsp Italian seasoning

Instructions

  1. Grate bread heels into crumbs using a food processor or hand grater.
  2. Place 1 cup breadcrumbs into a large skillet on Medium heat with 1 tbsp butter and 1 tbsp Italian seasoning. Omit the seasoning if you want plain breadcrumbs.
  3. Stir occasionally until crumbs are a toasty brown and feel dry to the touch, about 5-8 minutes.
  4. Let cool on a cookie sheet and package into labeled freezer bags.
Schema/Recipe SEO Data Markup by ZipList Recipe Plugin
http://creativesavingsblog.com/make-your-own/homemade-breadcrumbs/
Total Cost: $.18/cup


I figured this recipe would be pretty frugal…I just didn’t realize by how much! Generic brand breadcrumbs cost approximately $.57/cup, whereas the homemade version is much less. There’s really no point to spend that kind of money on stale bread when you can easily make your own.  

Best of all, it uses up those pesky leftover bread heels that I never end up eating, and saves them from the trash. Do this every month or so, and you will always have a stash of breadcrumbs in the freezer to pull out for any meal!  

Have you ever made homemade breadcrumbs?

      Which is cheaper? Homemade breadcrumbs or store-bought? Find out which one you should use as a pantry staple!

Tweetable:

  • Use up pesky bread heels and make your own breadcrumbs from scratch. It’s cheap, and easy! <– {Click to Tweet}

Disclosure: Some of the links in the post above are affiliate links. This means if you click on the link and purchase the item, I will receive an affiliate commission. Regardless, I only recommend products or services I use personally and believe will add value to my readers. Read my full disclosure policy here.

The post Make Your Own Breadcrumbs appeared first on Creative Savings.

Homemade Condensed Cream of Chicken Soup

$
0
0

This post may contain affiliate links. Read my full disclosure policy here.

Although canned soup is super convenient, nothing tastes as good as homemade condensed cream of chicken soup. Frugal & freezer friendly!

I don’t know about your family, but we go through a lot of condensed cream of chicken soup. Pretty much every casserole recipe we love seems to call for it, and I’m almost always picking up a can or two during our bi-weekly shopping trip.

While the convenience of buying condensed soup is nothing to be scoffed at, I wondered if I could make this pantry staple at home…and for less.

Surprisingly, it takes very few ingredients {as opposed to the long list on the back of a Campbell’s can}, and tastes much much better. In fact, we didn’t think there could be any way to improve upon our favorite potato soup, but this little change made all the difference, and we can’t imagine ever going back.

Seriously, you have to try it!

How to Make Condensed Cream of Chicken Soup

Step 1: Combine chicken broth with 1/2 cup milk in a large saucepan, then bring to a boil.

Homemade Condensed Cream of Chicken Soup | Creative Savings

You can definitely used canned chicken broth, but I feel like it defeats the whole purpose of homemade condensed soup, so I used my broth left over from cooking a whole chicken. It freezes so nicely and it’s practically free!

Step 2: In a small bowl, whisk together flour and seasonings, then stir in remaining milk until a smooth mixture forms.

Homemade Condensed Cream of Chicken Soup | Creative Savings

Step 3: Turn saucepan down to low heat, and pour in the flour and milk mixture. Stir continuously with a whisk {pot should be slightly simmering}, until mixture is smooth and thick, about 10-12 minutes.

Homemade Condensed Cream of Chicken Soup | Creative Savings

Mixture will continue to thicken as it cools.

Step 4: Cool soup completely, and then fill clean jars with 1 cup each, leaving 1/2 of space at the top of the jar. Freeze until you need to use in a recipe, and get out to thaw the morning of.

Homemade Condensed Cream of Chicken Soup | Creative Savings

Homemade Condensed Cream of Chicken Soup

Yield: 3 cups of soup = 3 cans

Ingredients

  • 2 1/2 cups chicken broth
  • 1 1/2 cups milk, divided
  • 3/4 cup flour
  • 1/2 tsp onion powder
  • 1/2 tsp garlic powder
  • 1 tsp salt
  • 1/2 tsp parsley

Instructions

  1. Combine chicken broth and 1/2 cup milk in a large saucepan, bring to a low boil.
  2. In a small bowl, whisk flour and seasonings into remaining 1 cup milk until a smooth, thick texture forms.
  3. Pour flour and milk mixture into the saucepan with the broth mixture on low heat and stir continuously, whisking as the mixture simmers. Continue to simmer and stir/whisk until the mixture is smooth and thick, about 10-12 minutes. The mixture will thicken even more as it cools.
Schema/Recipe SEO Data Markup by ZipList Recipe Plugin
http://creativesavingsblog.com/make-your-own/homemade-condensed-cream-of-chicken-soup/

Total Cost: $.57/batch or $.19/can {with homemade chicken broth}

Which is cheaper? Homemade cream of chicken soup or the canned version from the store? Find out which one you should use as a pantry staple!

I actually had a really hard time calculating the price of this recipe, because the chicken broth is such a minimal expense if you make your own.

In fact, now that I’m always making this soup to have on hand, all my chicken broth gets saved and frozen for when I need it. You really can’t ask for a better deal than that!

If there were ever a pantry staple to switch out, make homemade condensed cream of chicken soup the one. It’s super simple to do, tastes amazing, and freezes just perfectly.

How often do you use Cream of Chicken Soup?


Although canned soup is super convenient, nothing tastes as good as homemade condensed cream of chicken soup. It's freezer friendly and incredibly frugal!

Disclosure: Some of the links in the post above are affiliate links. This means if you click on the link and purchase the item, I will receive an affiliate commission. Regardless, I only recommend products or services I use personally and believe will add value to my readers. Read my full disclosure policy here.

The post Homemade Condensed Cream of Chicken Soup appeared first on Creative Savings.

Homemade Chocolate Peanut Butter Eggs

$
0
0

This post may contain affiliate links. Read my full disclosure policy here.

These chocolate peanut butter eggs are to-die-for! The peanut butter filling melts in your mouth & makes a delectable Easter treat.

Growing up, I absolutely loved digging through all the goodies that made their way into my Easter basket — Malt balls, solid chocolate bunnies, and egg shaped Reese’s peanut butter cups were my staples, and I’d savor the candy until Summer, picking and choosing one item out of my basket to eat each week.

With this spring-like Holiday coming right up, I thought it would be fun to try homemade chocolate peanut butter eggs, and I am so excited at how well they turned out!

The peanut butter filling melts in your mouth and tastes exactly like a Reese’s….maybe better. They honestly didn’t take too long to make either. My only complaint is that this recipe did not make enough!

How to Make Homemade Peanut Butter Eggs

Step 1: In a medium saucepan, combine peanut butter, butter, and brown sugar over medium heat.

Chocolate Peanut Butter Eggs | Creative Savings

Let the heat melt everything completely, stirring consistently with a spoon so the bottom doesn’t burn. You should let the mixture bubble just a little.

Step 2: Remove the pan from heat and add in powdered sugar, 1/4 cup at a time, stirring until fully incorporated between each amount.

Chocolate Peanut Butter Eggs | Creative Savings

 Set the pan aside and let cool to room temperature.

Chocolate Peanut Butter Eggs | Creative Savings

Step 3: Melt chocolate chips and shortening in the microwave at 30 second increments, stirring after each, until fully melted.

Chocolate Peanut Butter Eggs | Creative Savings

Step 4: Using a small spatula, drizzle chocolate into the compartments of an egg shaped silicone mold, being careful to coat the bottom and sides. Refrigerate until hardened.

Chocolate Peanut Butter Eggs | Creative Savings

I found that using a mold was much easier than trying to dip the filling in chocolate, and it made for a much prettier presentation at the end too.

Step 5: Pull chocolate molds out of the fridge and roll peanut butter mixture between hands to create an oval shape. Press into the molds making sure it is flattened and there is space along the side and top of the mold to coat with chocolate.

Chocolate Peanut Butter Eggs | Creative Savings

Step 6: Drizzle remaining chocolate over the molds and coat completely. Let harden for an hour in the fridge before peeling back the silicone and popping them out of the molds. Serve, and store in the fridge for up to a week…if they last that long!

Chocolate Peanut Butter Eggs | Creative Savings

Chocolate Peanut Butter Eggs | Creative Savings

Homemade Chocolate Peanut Butter Eggs

Yield: 1 dozen eggs

Ingredients

  • 1 cup creamy peanut butter
  • 1/4 cup unsalted butter
  • 1/4 cup light brown sugar
  • 1 1/4 cups powdered sugar
  • 2 cups milk chocolate chips
  • 2 tbsp vegetable shortening

Instructions

  1. In medium saucepan, combine the peanut butter, butter, and brown sugar over medium heat. Heat until completely melted and starting to bubble a little, stirring constantly. Remove from heat. Add the powdered sugar 1/4 cup at a time, stirring after each addition until completely combined. Set aside and let cool to room temp.
  2. Melt chocolate chips and shortening in the microwave at 30 second increments, stirring after each, until fully melted. Using a small spatula, drizzle chocolate into the compartments of the egg shaped silicone mold, being careful to coat the bottom and sides. Refrigerate until hardened.
  3. Pull chocolate molds out of the fridge and roll peanut butter mixture between hands to create an oval shape. Press into the molds making sure it is flattened and there is space along the side and top of the mold to coat with chocolate.
  4. Drizzle remaining chocolate over the molds and coat completely. Let harden for an hour in the fridge before serving, and store in the fridge for up to a week.
Schema/Recipe SEO Data Markup by ZipList Recipe Plugin
http://creativesavingsblog.com/holiday-fun/homemade-chocolate-peanut-butter-eggs/

Total Cost: $5.03/batch or $.42/egg

This recipe is actually cheaper than store bought Reese’s eggs, but not by much. Peanut butter and chocolate chips are the most expensive ingredients, however, you should be able to reduce the cost with sales and coupons {and by stocking up when baking supplies go on sale during the Holidays.}

Even so, Easter comes only once a year, and this, my friend, makes for one heavenly special treat, and a major excuse to splurge. It’s a serious chocolate peanut butter euphoria happening right inside your mouth!

What is your favorite food to make for Easter?


How thrifty are those peanut butter eggs? See which one is cheaper...

Disclosure: Some of the links in the post above are affiliate links. This means if you click on the link and purchase the item, I will receive an affiliate commission. Regardless, I only recommend products or services I use personally and believe will add value to my readers. Read my full disclosure policy here.

The post Homemade Chocolate Peanut Butter Eggs appeared first on Creative Savings.


Make Your Own Fruit Snacks

$
0
0

This post may contain affiliate links. Read my full disclosure policy here.

Make fruit snacks that are actually good for you with this easy homemade recipe. Uses all-natural ingredients!

Any time I get a chance to experiment in the kitchen with homemade pantry staples, I take it. Honestly, there’s nothing that excites me more than taking a store-bought item and turning it into a made-from-scratch masterpiece. A domestic instinct, perhaps?

Lately, my new obsession has been with this DIY Pantry Cookbook by Kresha of Nourishing Joy, and although I’m not a real foodie, I do strive to be healthy {most of the time, anyway} and love when I can keep all those nasty preservatives out of our food. Kresha has a ton of fabulous recipes that don’t use a lot of sugar, and are super good for you. Plus, they meet my overwhelming need to make my own everything. Win-win!

Since Joseph is completely enamored with fruits snacks {seriously, you would think he was 5}, I was elated to find a recipe in there to make our own. The result? Not bad! My husband can’t stay out of them, and it makes me feel better that he isn’t eating waxy fruit-shaped candies anymore.

You will definitely want to try making these yourself as they are the perfect snack for little hands, and you totally feel good about feeding them to your kids!

How to Make Your Own Fruit Snacks

Step 1: Choose any fruit you’d like {I chose strawberries}, place in a blender, and puree until smooth. Make sure the puree equals 1 cup. You may have to take some of the puree out and set aside.

Make Your Own Fruit Snacks | Creative Savings

Step 2: Add a strong complementary fruit juice and light colored honey to the blender and puree again until smooth. Then, pour mixture into a large bowl and set aside.

Make Your Own Fruit Snacks | Creative Savings

Step 3: Fill a saucepan with 1 cup cold water and stir in the gelatin until combined. Place over medium-low heat and heat the mixture until the gelatin is dissolved, stirring occasionally (about 3 to 4 minutes).

Make Your Own Fruit Snacks | Creative Savings

Step 4: Pour the dissolved gelatin into the fruit mixture and whisk well to combine, then quickly pour the mixture into an ungreased 9″ x 9″ cake pan or into candy molds and allow to cool in the refrigerator uncovered for 2 to 3 hours. If you decide to use candy molds, work really fast as the mixture will set fairly quickly!

Make Your Own Fruit Snacks | Creative Savings

Step 5: Once the mixture is completely set, remove it carefully from the molds or cake pan. If you used a pan, cut them into squares with a knife or spatula. You should be able to get 12-13 horizontal strips and then cut each strip into 12 pieces.

Make Your Own Fruit Snacks | Creative Savings

Step 6: Store in an airtight container at room temperature for 2 to 3 days, or in the refrigerator for 1 to 2 weeks. I like to package mine into snack bags so I can quickly throw them into lunches!

Make Your Own Fruit Snacks | Creative Savings

Homemade Fruit Snacks

Yield: 144 pieces

Ingredients

  • 1 cup pureed fruit
  • 1 cup strongly flavored fruit juice
  • 1/4 cup honey (the lighter the color the better. Dark honey is stronger and less sweet)
  • 1 cup cold water
  • 1/3 cup unflavored gelatin (about 8 packets)

Instructions

  1. Place fruit in a blender and puree until smooth. Make sure the puree is 1 cup.
  2. Add the fruit juice and honey to the blender and puree again until smooth.
  3. Pour mixture into a large bowl and set aside.
  4. Fill a saucepan with 1 cup cold water and stir in the gelatin until combined. The mixture will be very thick and will want to congeal.
  5. Place over medium-low heat and heat the mixture until the gelatin is dissolved, stirring occasionally (about 3 to 4 minutes).
  6. Pour the dissolved gelatin into the fruit mixture and whisk well to combine. Quickly pour the mixture into an ungreased 9" x 9" cake pan or into candy molds and allow to cool in the refrigerator uncovered for 2 to 3 hours. If using candy molds, you must work extremely fast or the mixture will set before you can pour it all.
  7. Once the mixture is completely set remove it carefully from the molds or cake pan. If you used the cake pan, cut them into squares by cutting 12 horizontal strips and then each strip into 12 pieces.
  8. Store in an airtight container at room temperature for 2 to 3 days, or in the refrigerator for 1 to 2 weeks.

Notes

Recipe from the DIY Pantry Cookbook

Schema/Recipe SEO Data Markup by ZipList Recipe Plugin
http://creativesavingsblog.com/make-your-own/fruit-snacks/

Total Cost: $5.38/batch or $.74/serving {20 fruit snacks}

Are homemade fruit snacks cheaper than store-bought? You might be surprised at who wins this one!

Because there is so much gelatin in this recipe, homemade fruit snacks are actually just a little bit more expensive to make over brand name. However, I can knock down the cost down a lot just by purchasing unflavored gelatin in bulk rather than the store, which makes the comparison pretty much a wash.

Even though I wouldn’t go exclusively homemade  in the fruit snack department, this was still a fun recipe to try and fairly easy to put together. I am definitely looking forward to experimenting with different flavors in the future!

What homemade snacks do you love to make?


 Learn how to make pantry staples from scratch and get rid of processed foods for good!The DIY Pantry features over 100 homemade recipes and is the perfect complement to your cookbook collection. Learn how to make pantry staples from scratch and get rid of processed foods for good!

From graham crackers to homemade pasta, you can stock your pantry with ingredients you feel good about. And the best part? Each recipe can be completed in 30 minutes or less!

Buy the Book

Disclosure: Some of the links in the post above are affiliate links. This means if you click on the link and purchase the item, I will receive an affiliate commission. Regardless, I only recommend products or services I use personally and believe will add value to my readers. Read my full disclosure policy here.

I received this book free from Adams Media. The opinions I have expressed are my own. 

The post Make Your Own Fruit Snacks appeared first on Creative Savings.

Make Your Own Bacon Bits

$
0
0

This post may contain affiliate links. Read my full disclosure policy here.

Make your own bacon bits in just 15 minutes. They taste SO much better than store-bought!

If you’ve ever tried “real” bacon bits from the store, you’ve probably been sorely disappointed. The taste of bacon is completely off, and those flavorless pieces do absolutely nothing except pile even more calories on top of a small salad or baked potato. {And it’s not like they’re even worth it!}

But who has time to cook bacon every time you need it as a topping or for a recipe? It’s actually easier than you might think.

All you have to do is set aside 15 minutes and whip up a big batch of bacon all at once. Since they keep amazingly well in the freezer, you’ll always have a stash on hand whenever the need for bacon bits arise!

How to Make Your Own Bacon Bits

Step 1: Cut bacon strips 4 at a time with kitchen scissors and place into a frying pan.

Make Your Own Bacon Bits | Creative SavingsStep 2: Set frying pan on Medium High heat and stir occasionally until bacon is done. The timing will be different depending on how much bacon you put into the pan, so keep a close eye on it!

Make Your Own Bacon Bits | Creative Savings

Step 3: Drain bacon grease into a bowl and place bacon bits onto a plate with 2 sheets of paper towels on it to soak up remaining grease.

Make Your Own Bacon Bits | Creative Savings

Step 4: Pat dry, and remove paper towels so bacon sits directly on plate. Spread out bacon bits and flash-freeze for 10 minutes.

Make Your Own Bacon Bits | Creative Savings

Step 5: Pull bacon bits out of freezer and place into a labeled jar. Store in freezer and pull out whenever you need some!

Make Your Own Bacon Bits | Creative Savings

Total Cost: $2.75/cup

Store-bought bacon bits are slightly cheaper than cooking your own from pre-cut strips, but that’s considering you never buy bacon on sale. Our local Publix often has a Buy One Get One deal every few months, which makes the price pretty attractive.

We like to stock up and make bacon bits a few packages at a time, just so we always have some on hand in the freezer. I guess you could say it’s our very own convenience food, except this one tastes SO much better!

Do you buy bacon bits or make your own?


Should you buy store bought bacon bits or whip up your own at home? This post explains which is cheaper!

Disclosure: Some of the links in the post above are affiliate links. This means if you click on the link and purchase the item, I will receive an affiliate commission. Regardless, I only recommend products or services I use personally and believe will add value to my readers. Read my full disclosure policy here.

The post Make Your Own Bacon Bits appeared first on Creative Savings.

Habit #1: Make Your Own Bread

$
0
0

This post is part of my Year of Intention series, where I’m working on one mini habit each month to create lifelong change. Download your own Mini Habits worksheet here and follow along!

Learning to make your own bread is a frugal habit every homemaker should try! Not only is it much healthier, homemade bread costs pennies compared to those overpriced loaves at the store. Try one of the 9 recipes in this post to get started!

A few years ago, I discovered you could save quite a bit of money by making your own sandwich bread, and quickly developed a really good routine for it. Anytime I had a free afternoon at home, I’d make a batch to store and freeze in our deep freezer until we needed them.

But if I’m being really honest, it wasn’t always convenient, especially if we were super busy one week and I didn’t have time to make any bread at all. But rather beat myself up over it, I always tried my best to make as many loaves as possible when I could, and give myself grace when I couldn’t. Because even though I enjoyed making and actually preferred homemade bread, it’s not a crime to buy bread from the store!

However, once we moved down to Florida almost 2 years ago, we had so many changes going on in our lives that making my own bread soon became a long-lost habit.

Oh sure, I’d bake a few loaves here and there, but the task never really stuck. I was constantly throwing overpriced loaves into my cart at the grocery store and only felt slightly guilty that I could make my own at home for much less.

Now that I’m ready to get a few areas of my life back under control again, I thought the habit to my own bread would be perfect to tackle for the Year of Intention. Plus, it’s still somewhat cold and chilly down here {I know it’s a lot colder for you Northern folks!}, and that lovely smell of oven-baked bread is just the thing to make your home all comfy and cozy during the Winter months.

Habit #1 Action Plan:

  • Don’t buy any store-bought loaves. Hamburger buns, hot dog rolls, and my favorite Pillsbury crescent roll tubes are still ok to purchase. This challenge is mainly to replace the reliance on store-bought loaves used for toast and sandwiches.

Because I love printables {FYI: I’ll have one for each habit going forward}, I created one to keep me on track throughout the month. I truly believe that when it comes to developing ANY habit, checkpoints along the way give you a greater chance at success! <– {tweet that}

Learning to make your own bread costs pennies compared to those overpriced loaves at the store. Use this FREE printable to develop the habit of breadmaking in your home!

Download Habit #1 Checklist

Want to join?

1. Download the free printable above, then fill in your bread-making goals in preparation for this month’s habit. {Update 2/1/15: The Creative Savings community is currently working on another habit from our 12 Mini Habits list, but many of us are still making our own homemade bread!}

2. Search for bread-making inspiration on Pinterest {and if you’d like, create your very own Pinterest board to keep track of the recipes.} Here is a roundup of gorgeous looking Sandwich Bread to get you started!

Learning to make your own bread is a frugal habit every homemaker should try! Pick one of these basic, no-fail bread recipes to get started. The Everyday Sandwich Bread is a tried-and-true favorite!

Everyday Sandwich Bread // Butter Topped White Bread // Basic Whole Wheat Bread // Buttermilk American Sandwich Bread // Whole Wheat Honey Oatmeal Bread // Honey Wheat Bread // Soft and Fluffy Sandwich Bread (Vegan) // Steakhouse Bread // Soft White Sandwich Bread

3. Share a photo of your homemade bread on Facebook or Instagram with the hashtag #12MiniHabits. Social accountability works!

4. Join the CSB Inner Circle to connect with other Creative Savings readers who are developing this same habit. Ask questions, share recipes, and by all means, show off your progress!

Be sure to check out my massive homemade bread troubleshooting post {this is a must-read if you tend to have a lot of problems with yeast, rising, etc}, and if you’d like to try a bread recipe outside the typical sandwich loaf, you’ll love these ridiculously easy Homemade English Muffins!

Let me know in the comments below if you’ll be working on this Habit with me throughout the month. I’d love for us to encourage and keep each other accountable. I’ll be sharing photos of my bread-making progress on Instagram right along with you.

{Update 2/1/15: Here are the results!}

Will you join me in baking bread this month?


– – – – –

 Follow along with the rest of my Year of Intention Series:

The Year of Intention: How to Take Control of Your Life One Mini Habit at a Time

Intentional mini habits are the BEST way to take control of your life if you want lasting results and longterm success!

The post Habit #1: Make Your Own Bread appeared first on Creative Savings.

Make Your Own English Muffins

$
0
0

This post may contain affiliate links. Read my full disclosure policy here.

These Homemade English Muffins are super easy to make, and cost pennies compared to packages in the store. The ultra low price beats even store brands!

English muffins are pretty much a breakfast, lunch, and dinner staple in our home, and I love love love the taste of the Thomas’ brand. However, they can be pretty pricey for a simple 6-pack, so I will often just go without, or stock up on a great BOGO sale at Publix.

It never really occurred to me that I could try and make my own English Muffins, and when I started seeing a few recipes floating around Pinterest, I filed those away with the intention of trying them someday.

Well, today’s that day, and I honestly don’t know why I waited so long, because they were super simple to make and turned out just like the real thing! In fact, they are so good, I’m not sure I’ll ever need to buy any English Muffins from the store again. Yep, for real. 

So set aside an afternoon this week, or a few hours over the weekend, because you are going to want to dive into an English Muffin making frenzy and stock up your freezer stat. At least that’s how I felt after just one batch — they are so much fun to make and eat, and your bread-maker does most of the work!

How to Make Homemade English Muffins

Step 1: Place in all liquid ingredients into the bread-maker first, then add dry ingredients, saving yeast for last. Set bread-maker on dough setting.

english-muffins-3cs

Step 2: After bread-maker is done kneading the dough, coat a pan or counter with cornmeal {be fairly liberal about it as the dough will be very wet}, and lay the dough on top. Sprinkle cornmeal all over dough and flatten out into about a 1 in. thick rectangle.

english-muffins-4cs

Step 3: Cut out circles of dough with a circle-shaped cookie cutter and carefully transfer each circle of dough over to a baking sheet. Cover and let dough rise for 20 minutes.

Homemade English Muffins | Creative Savings

Step 4: Heat a griddle or skillet on medium heat and let warm up a bit. Take circles of dough off pan with a flat spatula and place on the hot pan. Let cook for about 3-4 minutes until bottom has browned. Flip over to do the same to the other side, making sure to press down a little bit on the muffin with the spatula, as they poof while cooking.

Homemade English Muffins | Creative Savings

Step 5: When finished, take English Muffins off pan with spatula and let cool on a wire rack. Split open with a knife and toast, or serve right away with butter and my favorite strawberry jam!

Homemade English Muffins | Creative Savings

Homemade English Muffins

Serving Size: 12 muffins

Ingredients

  • 1 cup milk
  • 3 tablespoons butter
  • 1 egg
  • 1/2 teaspoon salt
  • 2 teaspoons sugar
  • 3 cups all-purpose flour
  • 1 1/2 teaspoons rapid-rise yeast

Instructions

  1. Put ingredients in bread machine starting with wet ingredients, then dry. Yeast should always be last. Start the dough cycle.
  2. When cycle is finished, sprinkle a liberal amount of corn meal over the counter, place dough on top and sprinkle with corn meal. Use your hands to pat the dough into a 1 inch thick rectangle and use a circle-shaped cookie cutter to cut muffins.
  3. Place the rounds on a baking sheet, cover and let rise for 20- 30 minutes.
  4. Heat a dry cast iron skillet or griddle over medium heat and cook the muffins 3-4 minutes on each side until golden brown.
  5. Split the muffins with a fork or serrated knife and serve warm with butter and jam. Freeze for later.

Notes

Recipe adapted from Food.com

http://creativesavingsblog.com/make-your-own/homemade-english-muffins/

Total Cost: $1.29/batch or $.11/serving

This recipe is pennies compared to the Thomas’ brand, and it’s just as good. Not as many nooks and crannies as I would like, but since the price is so low, I can take a few less crannies!

If you are just as anxious to try this recipe as I was, you may want to pin this image to your Breakfast Pinterest board right away so you don’t forget. And let me know in the comments below what store-bought breakfast foods you’ve tried to make at home. I’d love to replace all our breakfast staples with homemade at some point, which seems like a lofty goal, I know……but should keep me busy at least!

Have you ever tried making English Muffins before?


Disclosure: Some of the links in the post above are affiliate links. This means if you click on the link and purchase the item, I will receive an affiliate commission. Regardless, I only recommend products or services I use personally and believe will add value to my readers. Read my full disclosure policy here.

The post Make Your Own English Muffins appeared first on Creative Savings.

Habit #1: Recap and Results

$
0
0

This post may contain affiliate links. Read my full disclosure policy here.

This post is part of my Year of Intention series, where I’m working on one mini habit each month to create lifelong change. Download your own Mini Habits worksheet here and follow along!

This year's focus on mini habits kicked off with a super fun challenge --  make your own bread from SCRATCH. I'm sharing how I did, as well as a newly discovered bread recipe you will want to try right away!

This year’s focus on Mini Habits kicked off with a super fun challenge — make your own bread from scratch. {Find all the details about Habit #1 HERE}I originally wanted to work tackle bread-making first, because I was tired of buying store-bought loaves when I knew I could make cheaper, and healthier ones at home.

I’m happy to say, I did pretty well with this one!

By the end of the month, I had made 6 loaves {not 8 like I had planned}, but we did not buy any bread, even if we ran out. I also fell in love with a new BLT bread recipe from Passion for Baking. It held together so well and rose beautifully. It might be my new favorite!

Homemade BLT Bread | Creative Savings

To those of you who shared your gorgeous homemade bread photos on social media — THANK YOU! I loved seeing your lovely masterpieces, and it was exciting to have so many of you join me in this habit. It’s so much fun to do things together as friends, don’t you think?

I couldn’t resist sharing a few of your photos, so here’s a peek at what you made this month. You should be so proud of yourself!

bread-collage-1

joeandval | katievoelcker | ariaskitchen | Mindy B.

 bread-collage-2

Shannah M. | Tina M. | Julie S. | Jody K. 

bread-collage-3

Meredith A. | Jennifer B. | Sara C.

Everyone who shared a photo of their bread was eligible to win a brand new bread machine {or Amazon gift card of equal value}, and our winner for Habit #1 was Mindy B! Congrats, Mindy, and thank you for sharing your bread photos with us this month!

As a reminder, the purpose of 12 Mini Habits is to have 12 new habits by the end of the year, instead of resolutions that don’t last.

I’ll be continuing my habit of bread-making throughout the year, and if you would like to do the same, please keep sharing your photos on social media with the #12MiniHabits to be eligible for future giveaways. And if you’re new to this whole challenge, don’t be shy in joining us!

Habit #2 is already underway, so pop on over to this post for all the details, and happy bread making!

What did you enjoy most about making your own bread?


Disclosure: Some of the links in the post above are affiliate links. This means if you click on the link and purchase the item, I will receive an affiliate commission. Regardless, I only recommend products or services I use personally and believe will add value to my readers. Read my full disclosure policy here.

The post Habit #1: Recap and Results appeared first on Creative Savings.

Easy Chocolate Covered Strawberries

$
0
0

This post may contain affiliate links. Read my full disclosure policy here.

Gourmet chocolate-covered strawberries are super easy to recreate at home, and cost pennies compared to expensive online shops. They make the perfect treat for a romantic night in, or as yummy Valentine's Day gift for your sweetheart!
I don’t know if you’ve seen the price of gourmet strawberries lately, but they are expennnn-sive. 

At Harry and David, one dozen chocolate-covered strawberries sells for a whopping $49.95, plus, an additional $11.95 shipping charge required for overnight and refrigerated packaging. If I do my math correctly, ONE strawberry ends up costing approximately $5.15.

Pretty or not, that’s a lot of money for one fancy bite of fruit!

The thing is, chocolate covered strawberries are not all that hard to make. There are a few tricks to make sure the process is as flawless as possible, but anyone can do it.

And once you learn, think of the possibilities! Date night at home, bridal shower finger foods, and even Valentine’s Day make the perfect occasion to show off your culinary skills that cost pennies compared to expensive online shops.

How to Make Easy Chocolate Covered Strawberries

Step 1: Wash strawberries thoroughly and pat dry. Make sure there is no condensation or any wet spots on the berry prior to dipping, otherwise, the chocolate will get a little wonky and “seize up”. You should also let the strawberries come to room temperature so condensation doesn’t form when the cold berry hits warm chocolate.

Easy Chocolate Covered Strawberries | Creative Savings Blog

Step 2: Melt semi-sweet chocolate chips in a double boiler over low heat, without letting the water in the bottom of the boiler touch the bottom of the top pan. Place 1 tbsp of vegetable shortening for every 2 cups of chocolate chips that you melt to make the mixture silky smooth. Stir continuously until all chocolate has melted.

Easy Chocolate Covered Strawberries | Creative Savings Blog

Step 3: Hold strawberry by the leaves and dip until 3/4 coated. Lightly shake excess chocolate off strawberry and place carefully on a baking sheet lined with wax paper. If leaves fall off, use a toothpick to dip and pull strawberry out of the chocolate.

Easy Chocolate Covered Strawberries | Creative Savings Blog

Step 4: Melt white chocolate in double boiler using the same process as semi-sweet chocolate, and drizzle over strawberries with a fork or small spatula.

Easy Chocolate Covered Strawberries | Creative Savings Blog

Step 5: Let chocolate harden in fridge, then gift, or enjoy them yourself!

Easy Chocolate Covered Strawberries | Creative Savings Blog

Easy Chocolate Covered Strawberries

Yield: one dozen

Ingredients

  • 2 cups semi-sweet chocolate chips
  • 1 tbsp vegetable shortening
  • 1/2 cup white chocolate chips
  • 12 strawberries

Instructions

  1. Wash strawberries thoroughly and pat dry. Make sure there is no condensation or any wet spots on the berry prior to dipping, otherwise, the chocolate will get a little wonky and "seize up".
  2. Melt chocolate chips and shortening in a double boiler over low heat until thoroughly melted. Hold strawberries by leaves and dip into chocolate. Lightly shake and lay on wax paper-lined baking sheet.
  3. Melt white chocolate chips in double boiler over low heat until melted, then drizzle over chocolate-covered strawberries with a fork or small spatula.
  4. Refrigerate until hardened.
http://creativesavingsblog.com/make-your-own/easy-chocolate-covered-strawberries/

Total Cost: $5.44/dozen or $.45/strawberry

Almost $.50 a strawberry doesn’t sound like a whole lot of savings, but when you compare it to the $5.15 selling in gourmet shops, it’s practically a steal. Besides, special events don’t come around every day, so I think it’s always worth treating yourself {or your hubby!} every once in a while!

Though Joseph and I don’t typically spend a whole lot on each other for Valentine’s Day, a few of my blogging buddies and I thought it would be fun to treat one of YOU to a fun V-Day getaway, a fancy dinner at a 5-star restaurant, or even a quiet night at home without the kiddos, watching a romantic movie and sharing a giant size box of chocolates {or strawberries, of course.}

Whatever your Valentine wishes are, we’re giving away $550 to help them come true. Sound like a plan? Update: The winner of this giveaway is Molly U. Congrats!! 

Whatever your Valentine wishes are, we’re giving away $550 to help them come true!! We’ve provided lots of different ways to earn entries into our Valentine’s Day Hearts and Hugs $550 Giveaway, and the more ways you enter the better your chances of being the BIG giveaway winner.

We’ve provided lots of different ways to earn entries into our Valentine’s Day Hearts and Hugs $550 Giveaway, and the more ways you enter the better your chances of being the BIG giveaway winner. Along the way, you’ll discover amazing posts about all things Valentine’s Day from this group of talented bloggers. We’ve got mouthwatering recipes, crafts to make, romantic date ideas on a budget, Valentine’s decor and even a few gift ideas your Valentine will love.

What are you waiting for?! Enter now to win $550 Cash and think about all the fun things you could do with that amount! Good luck and Happy Valentine’s Day!

a Rafflecopter giveaway

Sponsored by:
Sunshine and Hurricanes | Sports Mom Survival Guide | Unexpected Elegance | Creative Savings | The Taylor House | Occasionally Crafty | Moritz Fine Designs | Today’s Frugal Mom | Baking with Mom | Managing Your Blessings | Town-N-Country Living | Mothering From Scratch

 Be sure to stop by each of our blogs this week as there will be so many great posts you won’t want to miss. Plus, the more times you enter the better your chances of winning the $550 Cash Giveaway!!!


Gourmet chocolate-covered strawberries are super easy to recreate at home, and cost pennies compared to expensive online shops. They make the perfect treat for a romantic night in, or as yummy Valentine`s Day gift for your sweetheart!


Disclosure: Some of the links in the post above are affiliate links. This means if you click on the link and purchase the item, I will receive an affiliate commission. Regardless, I only recommend products or services I use personally and believe will add value to my readers. Read my full disclosure policy here.

The post Easy Chocolate Covered Strawberries appeared first on Creative Savings.

Canning 101: How to Preserve Your Favorite Foods

$
0
0
Canning is THE BEST way to enjoy your garden all year round! This post shows you everything you need to know about how to can your favorite foods.

This post may contain affiliate links. Read my full disclosure policy here.

I really didn't think canning could be this easy!! I honestly had no idea where to start, but she outlines how to do it in just FOUR simple steps. Now I can't wait to try all those canning recipes I've been pinning—perfect for canning beginners like me!

Please join me in giving Brianna from Craft Thyme a warm welcome! Since I know very little about actual canning, I brought in an expert canner to show us the ropes. You’ll find Brianna’s teaching style very easy to follow, and when you’re done reading this post, hop on over to her blog where you’ll discover a wealth of knowledge about gardening and DIY!

– – – – –

One way to save on your grocery bill is to minimize produce costs.

Vegetables and fruit add up quickly, so buying in bulk or growing your own veggies can really save in the long run. But how do you minimize all that waste from uneaten vegetables? Canning!  

I always have an over abundance of vegetables from my garden, luckily I learned the family tradition of canning.  However, you don’t need a long family tradition to preserve your produce. With a few basic supplies you are set to can for life!

Basic Supplies for Canning:

There is a little bit of upfront cost with canning; however, once you have your basics you can reuse them for years.

A canning kit is a good way to go if you are a first time canner.  A basic kit will have everything you need except jars, lids, and recipe requirements.  However, you can start without a full kit.

canning-6

Necessary Items:

  1. Large flat bottomed pot: A canning pot has a large flat bottom for your jars to sit and process without tipping.
  2. Jar Lifter:  This nifty device is a tong made solely to lift jars.  I really consider these a must!
  3. Jars:  You can go from fancy Weck jars to basic Ball.  I honestly have some of every type, but I always prefer wide-mouth as they are easier to pack.
  4. Jar Lids: With the exception of fancy jars you will need to purchase small metal lids each time you can.  They are not reusable.  I always make sure to use my old ones in crafts or recycle them.
  5. Canning Salt: Almost every recipe will require some salt (even jams and jellies).  Canning salt is different than table salt.  Table salt will cause your final mixture to appear cloudy.

Optional Items:

  1. Lid lifter: A little magnet used to lift the hot lids from the pan.
  2. Canning Funnel: This funnel can make pouring liquid into jars much easier.
  3. Canning Rack: A metal wire rack that fits in the pot so you can lower and pick up multiple jars at a time.
  4. Jar Labels: You may think you will remember when you canned something.  You won’t. Trust me.

How to Can Properly and Safely:

Step 1: Picking Your Recipe and Prepping Your Jars

Water bath canning is perfect for pickles, jams, and jellies (acid foods).  Any non-acid foods need a pressure canner, which is not described here today.  In the following instructions, we will be making pickled beets (one of my favorites), but there are hundreds of recipes available online.

Once you have your recipe and food prepped, according to instructions, you will need to wash your jars and lids. A simple rinse in soapy water is all that is necessary.  Lids must be prepped in hot water directly before canning; follow the instructions on the lid box for details of temperature and time.

After washing, place your open glass jars into the canning pot with the water.  Turn them on to boil and allow the glass jars to gradually warm as the water heats to a rolling boil.

canning jar

Step 2: Packing Jars

In all cases of canning you will have to work quickly to remove hot jars from boiling water, place on a heat resistance surface (I use old towels), put in food/liquid, leave head space, cap with a lid, hand tighten the ring and place it back in the hot water.  Whoa!  That seems like a lot, but really it is simple.

You will do all of these steps as rapidly as possible to make sure your jars do not cool too much.  Cold glass jar + hot water = Broken glass. 🙁

  • Remove the hot jar and place on old towels that will keep the heat in
  • Place the food and hot liquid (mine is a vinegar mixed with sugar and spices) in the warm jars.  Repeat after me: Never place cold liquid in hot jars.

canning-5

  • Leave 1/4 inch of space from the top of the jar.  Use a small spatula or knife to poke (a very scientific term there) the items around in the jar.  This will make sure all the air is out and the items are packed tight.  This space, called head space, is needed to properly allow the air to leave the jar and seal correctly.

canning-4

  • Wipe the top of the jar with a clean rag to remove any food residue and place on a warmed lid. Hand tighten the ring down on the lid.  This will hold the lid in place during processing.
  • Immediately place the jars back in the boiling water.

Step 3: Processing the Jars

This is the least stressful part of the whole process.  Sit back, relax (or clean up the kitchen) and let your jars process for the allocated time.  The time varies depending on the recipe.  These beets had to stay in the water bath 45 minutes. Make sure to process the entire time.  Processing heats up the contents of the jar, kills any rogue bacteria, and insures a good firm seal.

canning-2

Step 4: Removal and Cooling

Jars need to be removed from the water and placed back on heat resistant and level surface.  They will need to sit 24 hours to fully cool and seal.

You may notice the lid is still puffed up in the middle.  As the jars cool you may hear an audible pop!  In fact, you want to hear that noise!  That is the sound of our lid sinking in and firmly sealing. To tell if a jar is firmly sealed press in the center.  If it moves up and down then you will need to store that jar in the refrigerator and consume it that week.

canning-7

I remember being shocked that you do not store jars with the rings on them.  You actually remove the rings and clean any residue out.  The rings can be placed back on if you want to transport or give jars as gifts, but in general stack them without the rings.  This maintains a better seal.

Here are some final tips:

  • Keep Jars Warm.  Jar breakage happens rarely but sticky fruit, boiling liquid, and broken glass is a pain to clean up.
  • Have fun with recipes but always pay attention to how much acid (vinegar) is required. You can play with herbs and spices but the acid is needed to insure you stay bacteria free.
  • Enlist a partner:  I have canned alone, but it is a lot more fun with friends.  Splitting the cost on bulk produce orders, working together to quickly process jars, splitting the finished product, all the while catching up with friends is a great way to make the process easy and fun.

Are you new to canning?

Leave your questions for Brianna in the comments below!


Brianna Ganskopp | Author & BloggerBrianna is one half of the blogging duo behind CraftThyme.com.  She and Adam author a blog featuring easy to replicate DIY, gardening, and craft tutorials.  IT professionals by day and DIY partners by night you can follow them on Facebook, Pinterest, Instagram, and Google+.

Disclosure: Some of the links in the post above are affiliate links. This means if you click on the link and purchase the item, I will receive an affiliate commission. Regardless, I only recommend products or services I use personally and believe will add value to my readers. Read my full disclosure policy here.

The post Canning 101: How to Preserve Your Favorite Foods appeared first on Creative Savings.


Cake Week: 5 Days to Create Professional-Looking Cakes at Home

$
0
0
Learn how to make professional-looking cakes at home! This series teaches you all the basic skills you need to take your homemade cakes to the next level.

This post may contain affiliate links. Read my full disclosure policy here.

Learn how to make simple, yet professional-looking cakes at home! This series is perfect for beginners, and teaches you all the skills you need to take your homemade cakes to the next level. You don't have to be a professional to use these cake decorating tips and tricks, but after showing everyone what you can do, friends will be paying YOU to make all their birthday goodies!


Some of you know this deep dark secret about me. The one I have from what seems like a whole other lifetime ago. I like to use it for those Get-to-Know-You-Games, because it always shocks everyone.

Ready for it? Okay, here it goes…

I ran my own cake business for two years right out of college.

Crazy, right?

It started by binge-watching episodes of Cake Boss and Ultimate Cake Off, and ended with me enrolling in all four of Michael’s Arts and Crafts Cake Classes. During that time, I discovered I was pretty good at it!

At first, I made simple birthday cakes, then it turned into shower cakes, and then the ultimate challenge—wedding cakes. I even sold cupcakes and cookies at my local farmer’s market during the Summer. My name? Simply Sweet.

shower-cake-1

While I don’t do cakes professionally anymore, I don’t regret any of the skills I learned. Those days spent in the kitchen practicing until my hands hurt, allowed me to create professional looking cakes at home, so now I don’t have to spend money to buy them from someone else.

You’ve seen the prices right? Hundreds, even thousands of dollars for themed cakes from specialty bakeries. Or, you have to settle for the $20 {not-so-amazing} cakes from the grocery store.

That’s why this week, I want to teach you some basic skills so you can create your own gorgeous cakes with ease. The best part? You don’t have to be a professional to use these tricks!

Tools You Need:You don't need hundreds of decorating tips and gadgets to make a pretty cake, but there are a few items that make a BIG difference in terms of professionalism. These cake decorating supplies should be in every home decorator's kitchen!

In case you’re worried, you don’t need hundreds of decorating tips and gadgets to make a pretty cake, but there are a few things that will make this journey a whole lot easier.

Here’s what I suggest:

  • High quality round cake pans. I prefer the 10″ and 6″ for two layer stacked cakes, and an 8″ for a two-layer single cake. This set is more cost effective than buying them individually.
  • Decorating bags and couplers
  • Icing spatula {I actually prefer the straight ones as opposed to the angled ones}
  • Tips 4 and Tip 12 {two sizes round}
  • Tip 21 {star}
  • Tip 1M {for cupcakes}
  • Icing colors {gels work much better than those liquid colors you get at the grocery store}

Optional, but useful:

Now you’re ready to create professional looking cakes!

Home Base:

This post will serve as home base for the entire series, so pin it now before you lose track. Each day, I’ll be updating the post with new links and graphics that will take you to each post. That way you have everything you need all in one place!

A Special Giveaway:

I also have a fun giveaway to help celebrate Cake Week, thanks to the folks at Craftsy.com! Craftsy is an online site that offers tons of skill-sharing classes—Sewing, Painting, Cake Decorating—they have it all!

TWO Craftsy classes are up for grabs so you can take your cake decorating {or other creative} skills to the next level.

You can choose from:

All you have to do is enter via the box below, and the winners will be announced in this Saturday’s newsletter. Good luck!

a Rafflecopter giveaway

Are you excited for this week as much as I am? I can’t wait to see your own inspired creations as you enter this whole new world of cake decorating!

Be sure to tag me on Instagram {@creativesavings} if you snap a photo of your work. You can also use the hashtag #CSBCakes. I’ll find you either way!

Are You Ready for a Week of Sugary Inspiration?


Disclosure: Some of the links in the post above are affiliate links. This means if you click on the link and purchase the item, I will receive an affiliate commission. Regardless, I only recommend products or services I use personally and believe will add value to my readers. Read my full disclosure policy here.

The post Cake Week: 5 Days to Create Professional-Looking Cakes at Home appeared first on Creative Savings.

Easy Buttercream Frosting

$
0
0
This easy buttercream frosting recipe works beautifully on cakes and cupcakes, and tastes good too! You can easily switch up the consistency for more intricate decorations like flowers and borders, but my favorite part is the unique “crust” it forms to keep all your creations in tact!

This post may contain affiliate links. Read my full disclosure policy here.

Welcome back to Cake Week! For five jam-packed days, I’m teaching you how to make professional looking cakes at home, so you can avoid those high bakery prices. You can find links to all posts in the series HERE.

This easy buttercream frosting recipe works beautifully on cakes and cupcakes, and tastes good too! You can easily switch up the consistency for more intricate decorations like flowers and borders, but my favorite part is the unique "crust" it forms to keep all your creations in tact!

There’s a lot of buttercream frosting recipes floating around, but the key is to find one you can use to frost cakes, pipe all sorts of intricate decorations, and still have it taste GOOD.

I’ve tried a few different variations of buttercream, but I keep coming back to this Wilton classic because it fits all three criteria. It also forms the perfect “crust” after it sits, so everything stays in tact and doesn’t sag or melt!

Another thing that is really unique, are the ingredients. Because this recipe doesn’t use any milk, eggs, or butter, it lasts for days in a sealed storage container. Technically, you could prep your frosting a day or two before you need it, but if you’re a frosting junkie like I am, it might not last that long!


How to Make Buttercream Icing:

Step 1: Cream shortening, vanilla and water. TIP: Use clear vanilla if you want a pure white icing.

buttercream

Step 2: Add dry ingredients and mix on medium speed until thoroughly mixed together.

buttercream-2

Step 3: Blend until creamy {usually 1 to 2 minutes}

buttercream-in-bowl

Step 4: Use immediately, or place in an airtight storage container for later!

buttercream-jar

Consistency Tips:

Before using, you will need to adjust the consistency of your icing depending on the project. You can thin the icing by putting in more water, or thicken it by adding confectioner’s sugar.

  • For icing cakes, use a thin-t0-medium consistency.
  • For cupcakes, use a medium-to-stiff consistency.
  • For piping flowers and borders, use a medium-to-stiff consistency.
  • For writing, use a thin consistency.

Basically, if your icing doesn’t come out right or do what you want it to do, it’s probably a consistency issue!

Coloring Tips:

I like to use coloring gels versus the watery drops you can buy in the grocery store. The quality and vibrancy is lot better and they also help maintain consistency. Remember though, a little goes a long way!

To Color:

  • Dip a toothpick into the color gel of your choice, and poke into the frosting in various places. The more color you get on the toothpick and more places you poke, the deeper the color will be.

buttercream-4

  • Mix thoroughly until the white part of the frosting is completely gone. Add more color for a darker hue.

buttercream-blue

Easy Buttercream Frosting

Yield: 3 cups

Ingredients

  • 1 cup solid white vegetable shortening
  • 1 tsp clear vanilla extract
  • 2 tbsp water
  • 1 lb confectioners sugar
  • 1 tbsp meringue powder

Instructions

  1. Cream shortening, vanilla and water.
  2. Add dry ingredients and mix on medium speed until thoroughly mixed together.
  3. Blend until creamy {usually 1 to 2 minutes}.

Total Cost: $2.63 per batch

Now that you know which icing to use, are you ready to take this buttercream for a test drive? All my Cake Week posts are listed right HERE, so you can practice your skills.

Do you have a favorite buttercream icing recipe?


Disclosure: Some of the links in the post above are affiliate links. This means if you click on the link and purchase the item, I will receive an affiliate commission. Regardless, I only recommend products or services I use personally and believe will add value to my readers. Read my full disclosure policy here.

The post Easy Buttercream Frosting appeared first on Creative Savings.

How to Frost Cupcakes Like a Pro

$
0
0
Learn how to frost cupcakes like a pro with this super simple technique. Everyone will think your homemade treats look just like a professional bakery!

This post may contain affiliate links. Read my full disclosure policy here.

Welcome back to Cake Week! For five jam-packed days, I’m teaching you how to make professional looking cakes at home, so you can avoid those high bakery prices. You can find links to all posts in the series HERE.

These cupcakes look SO delicious! I can't believe how simple it is to create that pretty swirl. I'm totally doing this next time I make cupcakes for a birthday party or baby shower!

Back in elementary school, we always had to bring a snack for someone’s birthday. I often brought box-mix cupcakes with a slather of frosting on top and a dusting of sprinkles. They didn’t look awful, but they were definitely “homemade”.

What can I say, it’s really hard to smooth frosting with a knife!

Besides, I thought professionally swirled cupcakes only existed in expensive bakeries. Little did I know how easy it was to recreate the exact same look at home, just by using a simple decorating tip.

So whip up some icing, grab a spoon, and see how simple this technique really is in the video below. Enjoy!


Supplies Used:

Troubleshooting Tips:

  • If your icing is hard to squeeze out of the bag, then it is too thick and needs to be thinned out with water. If your icing sags and droops, it’s too thin and needs more confectionary sugar. You may want to test your icing before tackling your first cupcake.
  • If your icing looks wobbly, this is a result of inconsistent pressure on the bag. Consistency makes perfect!

Learn how to frost cupcakes like a pro with this super simple technique. Everyone will think your homemade treats look just like a professional bakery!

I find myself loving cupcakes even more than cake, simply because they’re so cute and versatile. You can even create mini cupcakes for baby showers, bridal showers, or graduation parties. Everyone loves cupcakes!

How Often Do You Make Cupcakes?


Disclosure: Some of the links in the post above are affiliate links. This means if you click on the link and purchase the item, I will receive an affiliate commission. Regardless, I only recommend products or services I use personally and believe will add value to my readers. Read my full disclosure policy here.

The post How to Frost Cupcakes Like a Pro appeared first on Creative Savings.

DIY Simple Celebration Cake

$
0
0
Don’t settle for grocery store sheet cakes or overpriced bakery cakes for your next celebration. Learn how to decorate your own with these easy birthday cake ideas!

This post may contain affiliate links. Read my full disclosure policy here.

Welcome back to Cake Week! For five jam-packed days, I’m teaching you how to make professional looking cakes at home, so you can avoid those high bakery prices. You can find links to all posts in the series HERE.

This girl makes decorating a cake look so easy! I'm going to try this instead of buying a sheet cake for my daughter's next birthday party. My biggest takeaway—level your cake BEFORE you decorate!

When it comes to cake decorating, the ultimate culmination of skills come together for one, and only one project—the actual cake!

Today, we’re going to create a simple, yet festive celebration cake that tastes better than the ones you pick up at the grocery store, and costs a lot less than your local bakery.

Now, let’s be reasonable. If you’re looking for a crazy Cake Boss cake, then this tutorial probably isn’t for you. However, one of my favorite things about this cake is it’s not only pretty {and easy!}, it’s also customizable for just about every occasion—retirements, communions, graduations, showers—anything!

This five-minute video shows you how to assemble, frost, and decorate this simple cake. Plus, since it only uses THREE decorating tips, you don’t have to go out and buy a huge set to start decorating!

Enjoy!


List of Tools Used:

If you’re not sure how to fill a decorating bag, this video gives you a quick overview.

And in case you’re wondering about my super secret cake recipe, it’s a box mix! I swear by Pillsbury Moist Supreme cakes and all my customers would rave about how good they are. It is also the only instance where the word moist is allowed in my house. 😉

birthday-cake-horizontal-WM-4

Troubleshooting Tips:

  • If your spatula picks up crumbs while icing your cake, thin down your icing with a little water until it’s easier to spread. Always wipe off the crumbs before dipping back into the icing bowl.
  • Be sure to keep consistent pressure on the bag and go slow while you’re writing the message on top. We want the icing to fall on it’s own to create soft loops and letters. Don’t force it!

birthday-cake-horizontal-WM-5

When you make cakes for special events, there’s always the question of how much cake to make. For instance, How do you know an 8″ round will be enough for a party with twenty guests? How much icing should you make to cover {and decorate} said cake?

You don’t, unless you can magically estimate like a pro.

That’s why I use a baking and serving cheat sheet to tell me the exact amounts I need. This sheet has served me well during my years of professional cake baking, and I still use it to this day!

You can download a copy of the cheat sheet by entering your name and email into the box below. This gives me permission to send it straight to you!


Hungry for more cake decorating tips? Don’t miss all the posts from Cake Week HERE.

Have an event coming up that requires a cake? Take the plunge, then post a photo on Instagram with the hashtag #CSBCakes!

What event would you make this cake for?


Disclosure: Some of the links in the post above are affiliate links. This means if you click on the link and purchase the item, I will receive an affiliate commission. Regardless, I only recommend products or services I use personally and believe will add value to my readers. Read my full disclosure policy here.

The post DIY Simple Celebration Cake appeared first on Creative Savings.

Better than Starbucks Cranberry Orange Scones

$
0
0
You’ll be transported to a whole other world with just one bite of this better than Starbucks scone recipe. They’re totally company worthy and freeze well too!

This post may contain affiliate links. Read my full disclosure policy here.

OMG This is the breakfast recipe that I have been looking for!! These taste almost like the Starbucks Cranberry-orange scones... but BETTER! I didn't know that was possible. Starbucks scones are good, but these copycat starbucks scones are just simply amazing!

Even though I don’t drink coffee {crazy, I know}, I’m still a huge Starbucks fan.

I feel like I’m going on a mini retreat when step inside and order my favorite Double Chocolately Chip Frappuccino. And if it’s close to lunchtime, I’ll splurge and get a warmed-up Cranberry Orange Scone too. Living dangerously, I tell you.

The last time I bit into a warm scone though, I had the most anti-Starbucks thought ever. I wondered if I could make my own Cranberry Orange Scone recipe at home.

I got right to work in the kitchen and glory be—got it right on the first try. It helps when you adapt a previous scone recipe, but still. I was kind of proud of myself!

I have to tell you—these scones are out of this WORLD. In fact, they tasted so good, Joseph {who isn’t a big fan of scones in the first place} couldn’t stop eating them! He was huge fan, and I know you will be too.

Sorry Starbucks, but this recipe is way better. 

How to Make Cranberry Orange Scones

Step 1: Preheat oven to 425 degrees and prepare a baking sheet with parchment paper. Then in a food processor, add flour, sugar, salt, baking powder, and baking soda and lightly mix. Add butter and pulse until mixture is coarse.

Starbucks Scone Recipe | Cut up the butter before mixing in food processor.

Step 2: Place mixture into a bowl and make a well in the center. Add egg, vanilla, orange zest, and buttermilk.

Starbucks Scone Recipe | Mix in the Eggs, Milk, and Mandarin Orange Zes

Step 3: Whisk with a fork until dough is soft, then stir in cranberries.

Starbucks Scone Recipe | Cranberries are the best part! Mix them in with a fork.

Step 4: Kneed gently on a lightly floured surface. Then pat with your hands until dough is about 1″ thick. Cut into triangles.

Starbucks Scone Recipe | Don't roll them too thin! Keep it about an inch thick.

Step 5: Place triangles on prepared baking sheet, and brush with melted butter. Put the scones in the oven and turn the temperature down to 400 degrees.

Starbucks Scone Recipe | Lightly brush with melted butter.

Step 6: Bake for 12-18 minutes, until outside just begins to brown. Drizzle with icing, if desired.

Starbucks Scone Recipe | Best if served with an icing topping! But they are delicious without it as well {if you're watching your sugar intake}

Better than Starbucks Cranberry Orange Scones
Rate this recipe

Prep Time: 12 minutes

Cook Time: 18 minutes

Total Time: 30 minutes

Yield: 14-20 Scones

Better than Starbucks Cranberry Orange Scones

Ingredients

  • 4 cups all purpose flour
  • 1 cup sugar
  • 3/4 tsp salt
  • 4 tsp baking powder
  • 1/2 tsp baking soda
  • 1 cup unsalted butter cut into small pieces
  • 1 egg
  • 1 1/2 tsp vanilla extract
  • zest from 1 mandarin orange
  • 3/4 cup buttermilk
  • 1 cup dried cranberries
  • 4 tablespoons melted butter
  • For the Glaze:
  • 2 tbsp melted butter
  • 2 1/2 cup confectionary sugar
  • milk, as required

Instructions

  1. Preheat oven to 425 degrees. Prepare a baking sheet with parchment paper.
  2. In a food processor add flour, sugar, salt, baking powder, and baking soda and lightly mix. Add butter and pulse until mixture is coarse.
  3. Place mixture into a bowl and make a well in the center. Add egg, vanilla, orange zest, and buttermilk. Stir with a fork until dough is soft. Stir in cranberries.
  4. Kneed gently on a lightly floured surface. Then pat with your hands until dough is about 1" thick. Cut into triangles. Place triangles on the prepared baking sheet, and brush with melted butter. Put the scones in the oven and turn the temperature down to 400 degrees.
  5. Bake for 12-18 minutes, until outside just begins to brown.
  6. Mix icing ingredients and drizzle over warm scones.

Total Cost: $4.47 for the batch or $.31/serving (1 scone)

For a special breakfast treat on the weekends, make these scones ahead of time and freeze in a big bag for later. They warm up nicely 20-25 seconds in the microwave, and are totally company worthy!

Want even more comforting breakfast goodies?

These are a few of my go-to recipes:Blueberry Mall Muffins

I also offer a FREE meal planning worksheet, which is guaranteed to reduce stress around dinner time. Although personally, I love planning out my breakfast, lunch, and snack ideas too! Get it HERE.

What is your opinion of scones? Are you a fan?


Disclosure: Some of the links in the post above are affiliate links. This means if you click on the link and purchase the item, I will receive an affiliate commission. Regardless, I only recommend products or services I use personally and believe will add value to my readers. Read my full disclosure policy here.

The post Better than Starbucks Cranberry Orange Scones appeared first on Creative Savings.

Viewing all 26 articles
Browse latest View live


Latest Images