Quantcast
Channel: Make Your Own Archives - Kalyn Brooke

Canning 101: How to Preserve Your Favorite Foods

$
0
0
Canning is THE BEST way to enjoy your garden all year round! This post shows you everything you need to know about how to can your favorite foods.

This post may contain affiliate links. Read my full disclosure policy here.

I really didn't think canning could be this easy!! I honestly had no idea where to start, but she outlines how to do it in just FOUR simple steps. Now I can't wait to try all those canning recipes I've been pinning—perfect for canning beginners like me!

Please join me in giving Brianna from Craft Thyme a warm welcome! Since I know very little about actual canning, I brought in an expert canner to show us the ropes. You’ll find Brianna’s teaching style very easy to follow, and when you’re done reading this post, hop on over to her blog where you’ll discover a wealth of knowledge about gardening and DIY!

– – – – –

One way to save on your grocery bill is to minimize produce costs.

Vegetables and fruit add up quickly, so buying in bulk or growing your own veggies can really save in the long run. But how do you minimize all that waste from uneaten vegetables? Canning!  

I always have an over abundance of vegetables from my garden, luckily I learned the family tradition of canning.  However, you don’t need a long family tradition to preserve your produce. With a few basic supplies you are set to can for life!

Basic Supplies for Canning:

There is a little bit of upfront cost with canning; however, once you have your basics you can reuse them for years.

A canning kit is a good way to go if you are a first time canner.  A basic kit will have everything you need except jars, lids, and recipe requirements.  However, you can start without a full kit.

canning-6

Necessary Items:

  1. Large flat bottomed pot: A canning pot has a large flat bottom for your jars to sit and process without tipping.
  2. Jar Lifter:  This nifty device is a tong made solely to lift jars.  I really consider these a must!
  3. Jars:  You can go from fancy Weck jars to basic Ball.  I honestly have some of every type, but I always prefer wide-mouth as they are easier to pack.
  4. Jar Lids: With the exception of fancy jars you will need to purchase small metal lids each time you can.  They are not reusable.  I always make sure to use my old ones in crafts or recycle them.
  5. Canning Salt: Almost every recipe will require some salt (even jams and jellies).  Canning salt is different than table salt.  Table salt will cause your final mixture to appear cloudy.

Optional Items:

  1. Lid lifter: A little magnet used to lift the hot lids from the pan.
  2. Canning Funnel: This funnel can make pouring liquid into jars much easier.
  3. Canning Rack: A metal wire rack that fits in the pot so you can lower and pick up multiple jars at a time.
  4. Jar Labels: You may think you will remember when you canned something.  You won’t. Trust me.

How to Can Properly and Safely:

Step 1: Picking Your Recipe and Prepping Your Jars

Water bath canning is perfect for pickles, jams, and jellies (acid foods).  Any non-acid foods need a pressure canner, which is not described here today.  In the following instructions, we will be making pickled beets (one of my favorites), but there are hundreds of recipes available online.

Once you have your recipe and food prepped, according to instructions, you will need to wash your jars and lids. A simple rinse in soapy water is all that is necessary.  Lids must be prepped in hot water directly before canning; follow the instructions on the lid box for details of temperature and time.

After washing, place your open glass jars into the canning pot with the water.  Turn them on to boil and allow the glass jars to gradually warm as the water heats to a rolling boil.

canning jar

Step 2: Packing Jars

In all cases of canning you will have to work quickly to remove hot jars from boiling water, place on a heat resistance surface (I use old towels), put in food/liquid, leave head space, cap with a lid, hand tighten the ring and place it back in the hot water.  Whoa!  That seems like a lot, but really it is simple.

You will do all of these steps as rapidly as possible to make sure your jars do not cool too much.  Cold glass jar + hot water = Broken glass. 🙁

  • Remove the hot jar and place on old towels that will keep the heat in
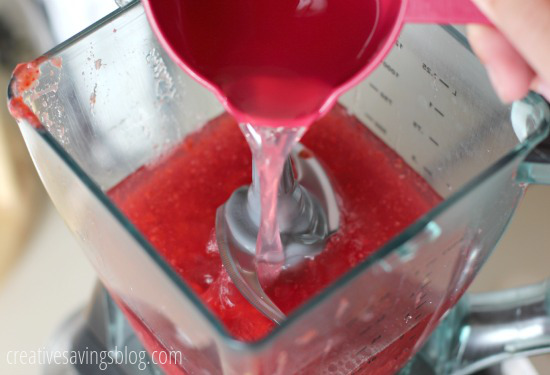
  • Place the food and hot liquid (mine is a vinegar mixed with sugar and spices) in the warm jars.  Repeat after me: Never place cold liquid in hot jars.

canning-5

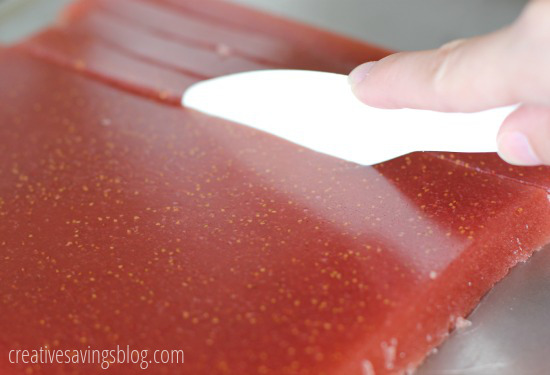
  • Leave 1/4 inch of space from the top of the jar.  Use a small spatula or knife to poke (a very scientific term there) the items around in the jar.  This will make sure all the air is out and the items are packed tight.  This space, called head space, is needed to properly allow the air to leave the jar and seal correctly.

canning-4

  • Wipe the top of the jar with a clean rag to remove any food residue and place on a warmed lid. Hand tighten the ring down on the lid.  This will hold the lid in place during processing.
  • Immediately place the jars back in the boiling water.

Step 3: Processing the Jars

This is the least stressful part of the whole process.  Sit back, relax (or clean up the kitchen) and let your jars process for the allocated time.  The time varies depending on the recipe.  These beets had to stay in the water bath 45 minutes. Make sure to process the entire time.  Processing heats up the contents of the jar, kills any rogue bacteria, and insures a good firm seal.

canning-2

Step 4: Removal and Cooling

Jars need to be removed from the water and placed back on heat resistant and level surface.  They will need to sit 24 hours to fully cool and seal.

You may notice the lid is still puffed up in the middle.  As the jars cool you may hear an audible pop!  In fact, you want to hear that noise!  That is the sound of our lid sinking in and firmly sealing. To tell if a jar is firmly sealed press in the center.  If it moves up and down then you will need to store that jar in the refrigerator and consume it that week.

canning-7

I remember being shocked that you do not store jars with the rings on them.  You actually remove the rings and clean any residue out.  The rings can be placed back on if you want to transport or give jars as gifts, but in general stack them without the rings.  This maintains a better seal.

Here are some final tips:

  • Keep Jars Warm.  Jar breakage happens rarely but sticky fruit, boiling liquid, and broken glass is a pain to clean up.
  • Have fun with recipes but always pay attention to how much acid (vinegar) is required. You can play with herbs and spices but the acid is needed to insure you stay bacteria free.
  • Enlist a partner:  I have canned alone, but it is a lot more fun with friends.  Splitting the cost on bulk produce orders, working together to quickly process jars, splitting the finished product, all the while catching up with friends is a great way to make the process easy and fun.

Are you new to canning?

Leave your questions for Brianna in the comments below!


Brianna Ganskopp | Author & BloggerBrianna is one half of the blogging duo behind CraftThyme.com.  She and Adam author a blog featuring easy to replicate DIY, gardening, and craft tutorials.  IT professionals by day and DIY partners by night you can follow them on Facebook, Pinterest, Instagram, and Google+.

Disclosure: Some of the links in the post above are affiliate links. This means if you click on the link and purchase the item, I will receive an affiliate commission. Regardless, I only recommend products or services I use personally and believe will add value to my readers. Read my full disclosure policy here.

The post Canning 101: How to Preserve Your Favorite Foods appeared first on Creative Savings.


Cake Week: 5 Days to Create Professional-Looking Cakes at Home

$
0
0
Learn how to make professional-looking cakes at home! This series teaches you all the basic skills you need to take your homemade cakes to the next level.

This post may contain affiliate links. Read my full disclosure policy here.

Learn how to make simple, yet professional-looking cakes at home! This series is perfect for beginners, and teaches you all the skills you need to take your homemade cakes to the next level. You don't have to be a professional to use these cake decorating tips and tricks, but after showing everyone what you can do, friends will be paying YOU to make all their birthday goodies!


Some of you know this deep dark secret about me. The one I have from what seems like a whole other lifetime ago. I like to use it for those Get-to-Know-You-Games, because it always shocks everyone.

Ready for it? Okay, here it goes…

I ran my own cake business for two years right out of college.

Crazy, right?

It started by binge-watching episodes of Cake Boss and Ultimate Cake Off, and ended with me enrolling in all four of Michael’s Arts and Crafts Cake Classes. During that time, I discovered I was pretty good at it!

At first, I made simple birthday cakes, then it turned into shower cakes, and then the ultimate challenge—wedding cakes. I even sold cupcakes and cookies at my local farmer’s market during the Summer. My name? Simply Sweet.

shower-cake-1

While I don’t do cakes professionally anymore, I don’t regret any of the skills I learned. Those days spent in the kitchen practicing until my hands hurt, allowed me to create professional looking cakes at home, so now I don’t have to spend money to buy them from someone else.

You’ve seen the prices right? Hundreds, even thousands of dollars for themed cakes from specialty bakeries. Or, you have to settle for the $20 {not-so-amazing} cakes from the grocery store.

That’s why this week, I want to teach you some basic skills so you can create your own gorgeous cakes with ease. The best part? You don’t have to be a professional to use these tricks!

Tools You Need:You don't need hundreds of decorating tips and gadgets to make a pretty cake, but there are a few items that make a BIG difference in terms of professionalism. These cake decorating supplies should be in every home decorator's kitchen!

In case you’re worried, you don’t need hundreds of decorating tips and gadgets to make a pretty cake, but there are a few things that will make this journey a whole lot easier.

Here’s what I suggest:

  • High quality round cake pans. I prefer the 10″ and 6″ for two layer stacked cakes, and an 8″ for a two-layer single cake. This set is more cost effective than buying them individually.
  • Decorating bags and couplers
  • Icing spatula {I actually prefer the straight ones as opposed to the angled ones}
  • Tips 4 and Tip 12 {two sizes round}
  • Tip 21 {star}
  • Tip 1M {for cupcakes}
  • Icing colors {gels work much better than those liquid colors you get at the grocery store}

Optional, but useful:

Now you’re ready to create professional looking cakes!

Home Base:

This post will serve as home base for the entire series, so pin it now before you lose track. Each day, I’ll be updating the post with new links and graphics that will take you to each post. That way you have everything you need all in one place!

A Special Giveaway:

I also have a fun giveaway to help celebrate Cake Week, thanks to the folks at Craftsy.com! Craftsy is an online site that offers tons of skill-sharing classes—Sewing, Painting, Cake Decorating—they have it all!

TWO Craftsy classes are up for grabs so you can take your cake decorating {or other creative} skills to the next level.

You can choose from:

All you have to do is enter via the box below, and the winners will be announced in this Saturday’s newsletter. Good luck!

a Rafflecopter giveaway

Are you excited for this week as much as I am? I can’t wait to see your own inspired creations as you enter this whole new world of cake decorating!

Be sure to tag me on Instagram {@creativesavings} if you snap a photo of your work. You can also use the hashtag #CSBCakes. I’ll find you either way!

Are You Ready for a Week of Sugary Inspiration?


Disclosure: Some of the links in the post above are affiliate links. This means if you click on the link and purchase the item, I will receive an affiliate commission. Regardless, I only recommend products or services I use personally and believe will add value to my readers. Read my full disclosure policy here.

The post Cake Week: 5 Days to Create Professional-Looking Cakes at Home appeared first on Creative Savings.

Easy Buttercream Frosting

$
0
0
This easy buttercream frosting recipe works beautifully on cakes and cupcakes, and tastes good too! You can easily switch up the consistency for more intricate decorations like flowers and borders, but my favorite part is the unique “crust” it forms to keep all your creations in tact!

This post may contain affiliate links. Read my full disclosure policy here.

Welcome back to Cake Week! For five jam-packed days, I’m teaching you how to make professional looking cakes at home, so you can avoid those high bakery prices. You can find links to all posts in the series HERE.

This easy buttercream frosting recipe works beautifully on cakes and cupcakes, and tastes good too! You can easily switch up the consistency for more intricate decorations like flowers and borders, but my favorite part is the unique "crust" it forms to keep all your creations in tact!

There’s a lot of buttercream frosting recipes floating around, but the key is to find one you can use to frost cakes, pipe all sorts of intricate decorations, and still have it taste GOOD.

I’ve tried a few different variations of buttercream, but I keep coming back to this Wilton classic because it fits all three criteria. It also forms the perfect “crust” after it sits, so everything stays in tact and doesn’t sag or melt!

Another thing that is really unique, are the ingredients. Because this recipe doesn’t use any milk, eggs, or butter, it lasts for days in a sealed storage container. Technically, you could prep your frosting a day or two before you need it, but if you’re a frosting junkie like I am, it might not last that long!


How to Make Buttercream Icing:

Step 1: Cream shortening, vanilla and water. TIP: Use clear vanilla if you want a pure white icing.

buttercream

Step 2: Add dry ingredients and mix on medium speed until thoroughly mixed together.

buttercream-2

Step 3: Blend until creamy {usually 1 to 2 minutes}

buttercream-in-bowl

Step 4: Use immediately, or place in an airtight storage container for later!

buttercream-jar

Consistency Tips:

Before using, you will need to adjust the consistency of your icing depending on the project. You can thin the icing by putting in more water, or thicken it by adding confectioner’s sugar.

  • For icing cakes, use a thin-t0-medium consistency.
  • For cupcakes, use a medium-to-stiff consistency.
  • For piping flowers and borders, use a medium-to-stiff consistency.
  • For writing, use a thin consistency.

Basically, if your icing doesn’t come out right or do what you want it to do, it’s probably a consistency issue!

Coloring Tips:

I like to use coloring gels versus the watery drops you can buy in the grocery store. The quality and vibrancy is lot better and they also help maintain consistency. Remember though, a little goes a long way!

To Color:

  • Dip a toothpick into the color gel of your choice, and poke into the frosting in various places. The more color you get on the toothpick and more places you poke, the deeper the color will be.

buttercream-4

  • Mix thoroughly until the white part of the frosting is completely gone. Add more color for a darker hue.

buttercream-blue

Easy Buttercream Frosting

Yield: 3 cups

Ingredients

  • 1 cup solid white vegetable shortening
  • 1 tsp clear vanilla extract
  • 2 tbsp water
  • 1 lb confectioners sugar
  • 1 tbsp meringue powder

Instructions

  1. Cream shortening, vanilla and water.
  2. Add dry ingredients and mix on medium speed until thoroughly mixed together.
  3. Blend until creamy {usually 1 to 2 minutes}.

Total Cost: $2.63 per batch

Now that you know which icing to use, are you ready to take this buttercream for a test drive? All my Cake Week posts are listed right HERE, so you can practice your skills.

Do you have a favorite buttercream icing recipe?


Disclosure: Some of the links in the post above are affiliate links. This means if you click on the link and purchase the item, I will receive an affiliate commission. Regardless, I only recommend products or services I use personally and believe will add value to my readers. Read my full disclosure policy here.

The post Easy Buttercream Frosting appeared first on Creative Savings.

DIY Simple Celebration Cake

$
0
0
Don’t settle for grocery store sheet cakes or overpriced bakery cakes for your next celebration. Learn how to decorate your own with these easy birthday cake ideas!

This post may contain affiliate links. Read my full disclosure policy here.

Welcome back to Cake Week! For five jam-packed days, I’m teaching you how to make professional looking cakes at home, so you can avoid those high bakery prices. You can find links to all posts in the series HERE.

This girl makes decorating a cake look so easy! I'm going to try this instead of buying a sheet cake for my daughter's next birthday party. My biggest takeaway—level your cake BEFORE you decorate!

When it comes to cake decorating, the ultimate culmination of skills come together for one, and only one project—the actual cake!

Today, we’re going to create a simple, yet festive celebration cake that tastes better than the ones you pick up at the grocery store, and costs a lot less than your local bakery.

Now, let’s be reasonable. If you’re looking for a crazy Cake Boss cake, then this tutorial probably isn’t for you. However, one of my favorite things about this cake is it’s not only pretty {and easy!}, it’s also customizable for just about every occasion—retirements, communions, graduations, showers—anything!

This five-minute video shows you how to assemble, frost, and decorate this simple cake. Plus, since it only uses THREE decorating tips, you don’t have to go out and buy a huge set to start decorating!

Enjoy!


List of Tools Used:

If you’re not sure how to fill a decorating bag, this video gives you a quick overview.

And in case you’re wondering about my super secret cake recipe, it’s a box mix! I swear by Pillsbury Moist Supreme cakes and all my customers would rave about how good they are. It is also the only instance where the word moist is allowed in my house. 😉

birthday-cake-horizontal-WM-4

Troubleshooting Tips:

  • If your spatula picks up crumbs while icing your cake, thin down your icing with a little water until it’s easier to spread. Always wipe off the crumbs before dipping back into the icing bowl.
  • Be sure to keep consistent pressure on the bag and go slow while you’re writing the message on top. We want the icing to fall on it’s own to create soft loops and letters. Don’t force it!

birthday-cake-horizontal-WM-5

When you make cakes for special events, there’s always the question of how much cake to make. For instance, How do you know an 8″ round will be enough for a party with twenty guests? How much icing should you make to cover {and decorate} said cake?

You don’t, unless you can magically estimate like a pro.

That’s why I use a baking and serving cheat sheet to tell me the exact amounts I need. This sheet has served me well during my years of professional cake baking, and I still use it to this day!

You can download a copy of the cheat sheet by entering your name and email into the box below. This gives me permission to send it straight to you!


Hungry for more cake decorating tips? Don’t miss all the posts from Cake Week HERE.

Have an event coming up that requires a cake? Take the plunge, then post a photo on Instagram with the hashtag #CSBCakes!

What event would you make this cake for?


Disclosure: Some of the links in the post above are affiliate links. This means if you click on the link and purchase the item, I will receive an affiliate commission. Regardless, I only recommend products or services I use personally and believe will add value to my readers. Read my full disclosure policy here.

The post DIY Simple Celebration Cake appeared first on Creative Savings.

Better than Starbucks Cranberry Orange Scones

$
0
0
You’ll be transported to a whole other world with just one bite of this better than Starbucks scone recipe. They’re totally company worthy and freeze well too!

This post may contain affiliate links. Read my full disclosure policy here.

OMG This is the breakfast recipe that I have been looking for!! These taste almost like the Starbucks Cranberry-orange scones... but BETTER! I didn't know that was possible. Starbucks scones are good, but these copycat starbucks scones are just simply amazing!

Even though I don’t drink coffee {crazy, I know}, I’m still a huge Starbucks fan.

I feel like I’m going on a mini retreat when step inside and order my favorite Double Chocolately Chip Frappuccino. And if it’s close to lunchtime, I’ll splurge and get a warmed-up Cranberry Orange Scone too. Living dangerously, I tell you.

The last time I bit into a warm scone though, I had the most anti-Starbucks thought ever. I wondered if I could make my own Cranberry Orange Scone recipe at home.

I got right to work in the kitchen and glory be—got it right on the first try. It helps when you adapt a previous scone recipe, but still. I was kind of proud of myself!

I have to tell you—these scones are out of this WORLD. In fact, they tasted so good, Joseph {who isn’t a big fan of scones in the first place} couldn’t stop eating them! He was huge fan, and I know you will be too.

Sorry Starbucks, but this recipe is way better. 

How to Make Cranberry Orange Scones

Step 1: Preheat oven to 425 degrees and prepare a baking sheet with parchment paper. Then in a food processor, add flour, sugar, salt, baking powder, and baking soda and lightly mix. Add butter and pulse until mixture is coarse.

Starbucks Scone Recipe | Cut up the butter before mixing in food processor.

Step 2: Place mixture into a bowl and make a well in the center. Add egg, vanilla, orange zest, and buttermilk.

Starbucks Scone Recipe | Mix in the Eggs, Milk, and Mandarin Orange Zes

Step 3: Whisk with a fork until dough is soft, then stir in cranberries.

Starbucks Scone Recipe | Cranberries are the best part! Mix them in with a fork.

Step 4: Kneed gently on a lightly floured surface. Then pat with your hands until dough is about 1″ thick. Cut into triangles.

Starbucks Scone Recipe | Don't roll them too thin! Keep it about an inch thick.

Step 5: Place triangles on prepared baking sheet, and brush with melted butter. Put the scones in the oven and turn the temperature down to 400 degrees.

Starbucks Scone Recipe | Lightly brush with melted butter.

Step 6: Bake for 12-18 minutes, until outside just begins to brown. Drizzle with icing, if desired.

Starbucks Scone Recipe | Best if served with an icing topping! But they are delicious without it as well {if you're watching your sugar intake}

Better than Starbucks Cranberry Orange Scones
Rate this recipe

Prep Time: 12 minutes

Cook Time: 18 minutes

Total Time: 30 minutes

Yield: 14-20 Scones

Better than Starbucks Cranberry Orange Scones

Ingredients

  • 4 cups all purpose flour
  • 1 cup sugar
  • 3/4 tsp salt
  • 4 tsp baking powder
  • 1/2 tsp baking soda
  • 1 cup unsalted butter cut into small pieces
  • 1 egg
  • 1 1/2 tsp vanilla extract
  • zest from 1 mandarin orange
  • 3/4 cup buttermilk
  • 1 cup dried cranberries
  • 4 tablespoons melted butter
  • For the Glaze:
  • 2 tbsp melted butter
  • 2 1/2 cup confectionary sugar
  • milk, as required

Instructions

  1. Preheat oven to 425 degrees. Prepare a baking sheet with parchment paper.
  2. In a food processor add flour, sugar, salt, baking powder, and baking soda and lightly mix. Add butter and pulse until mixture is coarse.
  3. Place mixture into a bowl and make a well in the center. Add egg, vanilla, orange zest, and buttermilk. Stir with a fork until dough is soft. Stir in cranberries.
  4. Kneed gently on a lightly floured surface. Then pat with your hands until dough is about 1" thick. Cut into triangles. Place triangles on the prepared baking sheet, and brush with melted butter. Put the scones in the oven and turn the temperature down to 400 degrees.
  5. Bake for 12-18 minutes, until outside just begins to brown.
  6. Mix icing ingredients and drizzle over warm scones.

Total Cost: $4.47 for the batch or $.31/serving (1 scone)

For a special breakfast treat on the weekends, make these scones ahead of time and freeze in a big bag for later. They warm up nicely 20-25 seconds in the microwave, and are totally company worthy!

Want even more comforting breakfast goodies?

These are a few of my go-to recipes:Blueberry Mall Muffins

I also offer a FREE meal planning worksheet, which is guaranteed to reduce stress around dinner time. Although personally, I love planning out my breakfast, lunch, and snack ideas too! Get it HERE.

What is your opinion of scones? Are you a fan?


Disclosure: Some of the links in the post above are affiliate links. This means if you click on the link and purchase the item, I will receive an affiliate commission. Regardless, I only recommend products or services I use personally and believe will add value to my readers. Read my full disclosure policy here.

The post Better than Starbucks Cranberry Orange Scones appeared first on Creative Savings.

Make Your Own Bacon Bits

$
0
0

This post may contain affiliate links. Read my full disclosure policy here.

Make your own bacon bits in just 15 minutes. They taste SO much better than store-bought!

If you've ever tried “real” bacon bits from the store, you've probably been sorely disappointed. The taste of bacon is completely off, and those flavorless pieces do absolutely nothing except pile even more calories on top of a small salad or baked potato. {And it's not like they're even worth it!}

But who has time to cook bacon every time you need it as a topping or for a recipe? It's actually easier than you might think.

All you have to do is set aside 15 minutes and whip up a big batch of bacon all at once. Since they keep amazingly well in the freezer, you'll always have a stash on hand whenever the need for bacon bits arise!

How to Make Your Own Bacon Bits

Step 1: Cut bacon strips 4 at a time with kitchen scissors and place into a frying pan.

Make Your Own Bacon Bits | Creative SavingsStep 2: Set frying pan on Medium High heat and stir occasionally until bacon is done. The timing will be different depending on how much bacon you put into the pan, so keep a close eye on it!

Make Your Own Bacon Bits | Creative Savings

Step 3: Drain bacon grease into a bowl and place bacon bits onto a plate with 2 sheets of paper towels on it to soak up remaining grease.

Make Your Own Bacon Bits | Creative Savings

Step 4: Pat dry, and remove paper towels so bacon sits directly on plate. Spread out bacon bits and flash-freeze for 10 minutes.

Make Your Own Bacon Bits | Creative Savings

Step 5: Pull bacon bits out of freezer and place into a labeled jar. Store in freezer and pull out whenever you need some!

Make Your Own Bacon Bits | Creative Savings

Total Cost: $2.75/cup

Store-bought bacon bits are slightly cheaper than cooking your own from pre-cut strips, but that's considering you never buy bacon on sale. Our local Publix often has a Buy One Get One deal every few months, which makes the price pretty attractive.

We like to stock up and make bacon bits a few packages at a time, just so we always have some on hand in the freezer. I guess you could say it's our very own convenience food, except this one tastes SO much better!

Do you buy bacon bits or make your own?


Should you buy store bought bacon bits or whip up your own at home? This post explains which is cheaper!

Disclosure: Some of the links in the post above are affiliate links. This means if you click on the link and purchase the item, I will receive an affiliate commission. Regardless, I only recommend products or services I use personally and believe will add value to my readers. Read my full disclosure policy here.

The post Make Your Own Bacon Bits appeared first on Kalyn Brooke.

Make Your Own Fruit Snacks

$
0
0

This post may contain affiliate links. Read my full disclosure policy here.

Make fruit snacks that are actually good for you with this easy homemade recipe. Uses all-natural ingredients!

Any time I get a chance to experiment in the kitchen with homemade pantry staples, I take it. Honestly, there's nothing that excites me more than taking a store-bought item and turning it into a made-from-scratch masterpiece. A domestic instinct, perhaps?

Lately, my new obsession has been with this DIY Pantry Cookbook by Kresha of Nourishing Joy, and although I'm not a real foodie, I do strive to be healthy {most of the time, anyway} and love when I can keep all those nasty preservatives out of our food. Kresha has a ton of fabulous recipes that don't use a lot of sugar, and are super good for you. Plus, they meet my overwhelming need to make my own everything. Win-win!

Since Joseph is completely enamored with fruits snacks {seriously, you would think he was 5}, I was elated to find a recipe in there to make our own. The result? Not bad! My husband can't stay out of them, and it makes me feel better that he isn't eating waxy fruit-shaped candies anymore.

You will definitely want to try making these yourself as they are the perfect snack for little hands, and you totally feel good about feeding them to your kids!

How to Make Your Own Fruit Snacks

Step 1: Choose any fruit you'd like {I chose strawberries}, place in a blender, and puree until smooth. Make sure the puree equals 1 cup. You may have to take some of the puree out and set aside.

Make Your Own Fruit Snacks | Creative Savings

Step 2: Add a strong complementary fruit juice and light colored honey to the blender and puree again until smooth. Then, pour mixture into a large bowl and set aside.

Make Your Own Fruit Snacks | Creative Savings

Step 3: Fill a saucepan with 1 cup cold water and stir in the gelatin until combined. Place over medium-low heat and heat the mixture until the gelatin is dissolved, stirring occasionally (about 3 to 4 minutes).

Make Your Own Fruit Snacks | Creative Savings

Step 4: Pour the dissolved gelatin into the fruit mixture and whisk well to combine, then quickly pour the mixture into an ungreased 9″ x 9″ cake pan or into candy molds and allow to cool in the refrigerator uncovered for 2 to 3 hours. If you decide to use candy molds, work really fast as the mixture will set fairly quickly!

Make Your Own Fruit Snacks | Creative Savings

Step 5: Once the mixture is completely set, remove it carefully from the molds or cake pan. If you used a pan, cut them into squares with a knife or spatula. You should be able to get 12-13 horizontal strips and then cut each strip into 12 pieces.

Make Your Own Fruit Snacks | Creative Savings

Step 6: Store in an airtight container at room temperature for 2 to 3 days, or in the refrigerator for 1 to 2 weeks. I like to package mine into snack bags so I can quickly throw them into lunches!

Make Your Own Fruit Snacks | Creative Savings

Print

Homemade Fruit Snacks


  • Prep Time: 5 minutes
  • Cook Time: 4 minutes
  • Total Time: 3 hours
  • Yield: 144 pieces

Ingredients

  • 1 cup pureed fruit
  • 1 cup strongly flavored fruit juice
  • 1/4 cup honey (the lighter the color the better. Dark honey is stronger and less sweet)
  • 1 cup cold water
  • 1/3 cup unflavored gelatin (about 8 packets)

Instructions

  1. Place fruit in a blender and puree until smooth. Make sure the puree is 1 cup.
  2. Add the fruit juice and honey to the blender and puree again until smooth.
  3. Pour mixture into a large bowl and set aside.
  4. Fill a saucepan with 1 cup cold water and stir in the gelatin until combined. The mixture will be very thick and will want to congeal.
  5. Place over medium-low heat and heat the mixture until the gelatin is dissolved, stirring occasionally (about 3 to 4 minutes).
  6. Pour the dissolved gelatin into the fruit mixture and whisk well to combine. Quickly pour the mixture into an ungreased 9″ x 9″ cake pan or into candy molds and allow to cool in the refrigerator uncovered for 2 to 3 hours. If using candy molds, you must work extremely fast or the mixture will set before you can pour it all.
  7. Once the mixture is completely set remove it carefully from the molds or cake pan. If you used the cake pan, cut them into squares by cutting 12 horizontal strips and then each strip into 12 pieces.
  8. Store in an airtight container at room temperature for 2 to 3 days, or in the refrigerator for 1 to 2 weeks.

Notes

Recipe from the DIY Pantry Cookbook

Total Cost: $5.38/batch or $.74/serving {20 fruit snacks}

Are homemade fruit snacks cheaper than store-bought? You might be surprised at who wins this one!

Because there is so much gelatin in this recipe, homemade fruit snacks are actually just a little bit more expensive to make over brand name. However, I can knock down the cost down a lot just by purchasing unflavored gelatin in bulk rather than the store, which makes the comparison pretty much a wash.

Even though I wouldn't go exclusively homemade  in the fruit snack department, this was still a fun recipe to try and fairly easy to put together. I am definitely looking forward to experimenting with different flavors in the future!

What homemade snacks do you love to make?


 Learn how to make pantry staples from scratch and get rid of processed foods for good!The DIY Pantry features over 100 homemade recipes and is the perfect complement to your cookbook collection. Learn how to make pantry staples from scratch and get rid of processed foods for good!

From graham crackers to homemade pasta, you can stock your pantry with ingredients you feel good about. And the best part? Each recipe can be completed in 30 minutes or less!

Buy the Book

Disclosure: Some of the links in the post above are affiliate links. This means if you click on the link and purchase the item, I will receive an affiliate commission. Regardless, I only recommend products or services I use personally and believe will add value to my readers. Read my full disclosure policy here.

I received this book free from Adams Media. The opinions I have expressed are my own. 

The post Make Your Own Fruit Snacks appeared first on Kalyn Brooke.

Make Your Own Spiced Cider


Make Your Own Breadcrumbs

Homemade Condensed Cream of Chicken Soup


Latest Images